Several users have reported that while updating iOS, their iPhones become stuck on the Attempting data recovery iphone screen. Do you experience the same problem where your iPhone shows Data Recovery Failed after attempting data recovery?
A common cause of this iPhone trying to recover data issue is when iOS is updated through iTunes. The error is more common in smaller older iPhones with less storage, such as 16GB, although large storage iPhones are also experiencing similar issues when updated. In this post, you will learn valuable tips for getting rid of the iPhone screen that says iphone Attempting data recovery.
Part 1. What does attempting data recovery mean on iPhone?
Part 2.How to Fix iPhone Attempting to Recover Data?
Part 3 How to Recover Data to iPhone That Lost Due to "Attempting Data Recovery" Error?
Part 1. What does attempting data recovery mean on iPhone?
Your iPhone may display the message "Attempting data recovery" if it's trying to restore data from a previous backup. You may experience this problem for data detect data recovery if you have restored your device from a backup or used a third-party software tool to fix a problem.
Reasons for iPhone stuck on attempting data recovery:
iOS updates via iTunes usually result in an attempt to recover data on iPhones. Data recovery on the iPhone is possible in three scenarios.
- iOS 17/1614 to iOS 13 or lower downgrade.
- Users who update their iPhones via iTunes and disconnect the device from the computer or Mac mid-way.
- Updating the latest iOS after attempting jailbreaking.
You can try several methods to fix the attempting data recovery iphone loop based on the experiences of customers who have resolved the update error. There are still solutions to recover lost data from your iPhone if you lost it due to the "Attempting data recovery" error during an iOS upgrade.
Part 2. How to Fix iPhone Attempting to Recovery Data?
There are a number of data recovery screens that can quickly solve the issue and restore your iPhone. Users of iPhones have often found themselves stuck in the “data recovery" loop again and again, which is driving them crazy.
Here's how you can fix this issue to get rid of it:
1. Pressing the Home Button
Data recovery on an iPhone may be time-consuming and annoying, but it is not something to worry about. You can simply press the Home Button and allow the update to finish once you notice your device has gone into the attempting data recovery loop. The iPhone will return to its previous state once it has finished updating. If you don't have time to wait, the following methods might work for you.
2. Forcing iPhone to Reboot

Secondly attempting recovery on your iPhone without any progress might be resolved with a force restart for reboot data recovery. Many iPhone problems can be determined by force restarting. The steps for forcing an iPhone to restart vary depending on the model.
For iPhone X/XS/XR/11/12/8/8plus/SE 2:
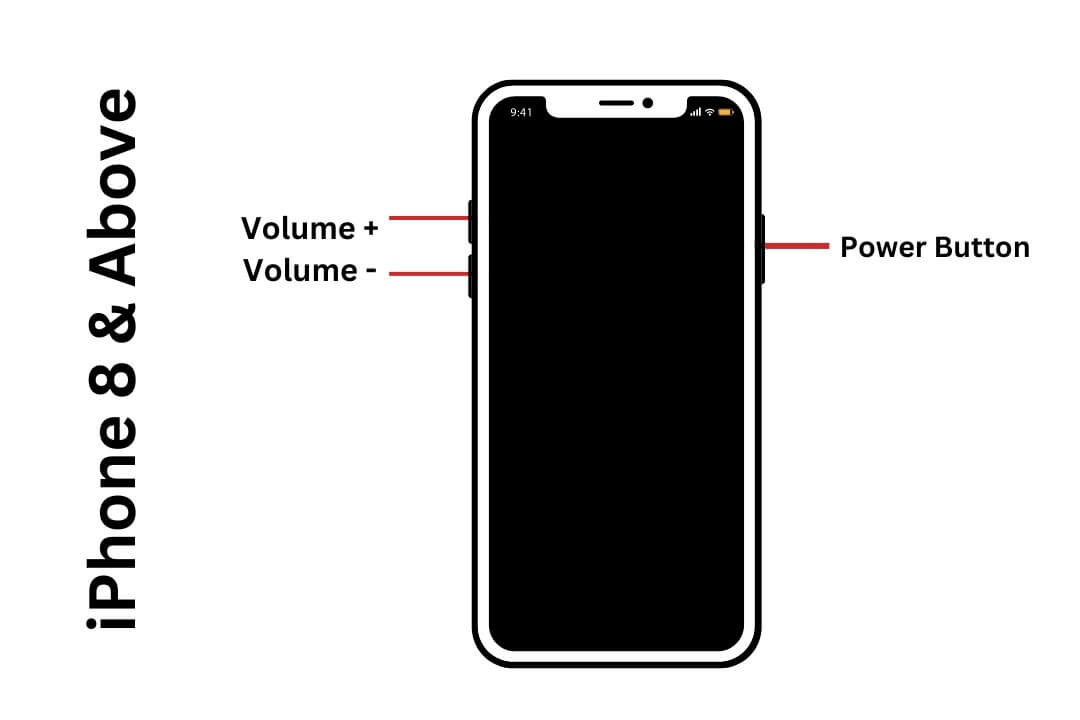
- 1.Hold the Volume Up button for a few seconds and release it quickly.
- 2.Hold down the Volume Down button for a few seconds and then release it.
- 3.Hold the power (Side) button until you see the Apple logo.
For iPhone 7/7 Plus:
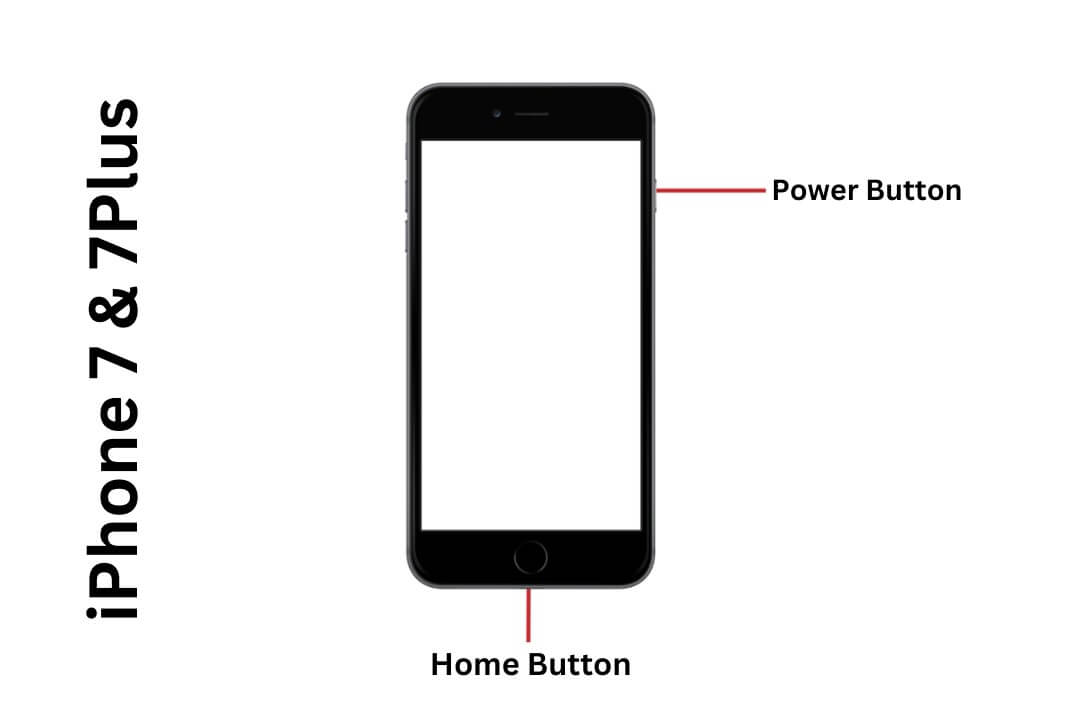
- Press the Volume Down and Sleep/Wake buttons.
- Keep it pressed and wait until the Apple logo appears.
Restart iPhone 6 and earlier models to Force Restart:
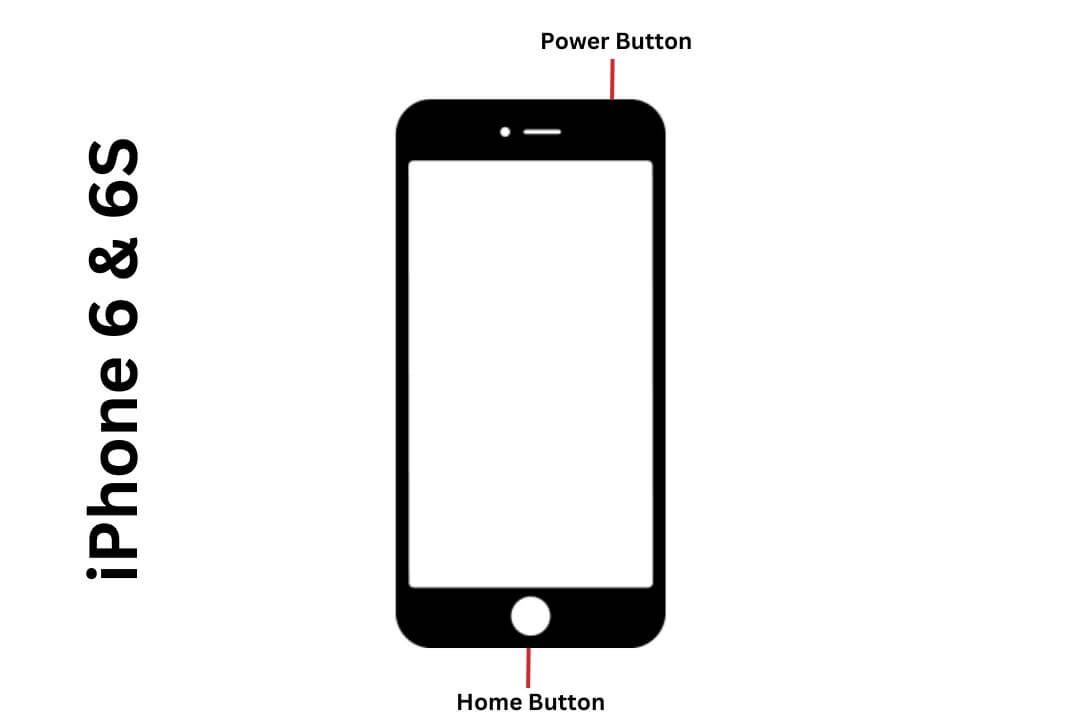
- Press and hold both the Home and Sleep/Wake buttons.
- Apple logo will appear on the screen after a successful restart.
3. Put your iPhone into Recovery Mode
As a last resort, you can put your iPhone in recovery mode if neither of the above methods works. The method usually works when an update fails on a device. The problem is fixed by putting it in recovery mode. It is important to keep in mind that this method will wipe all your iPhone data.
Here’s how to enter recovery mode on your iPhone:
- 1. Your device needs to be connected to a computer or a Mac.
- 2. Follow the steps above to force restart it, but keep holding the buttons even when the Apple logo appears until the "Connect to iTunes" screen appears.
- 3. As soon as you launch iTunes, a pop-up message will appear asking if you want to restore or update your device. Once you press "Update," iTunes will begin reinstalling iOS without sacrificing your valuable data.
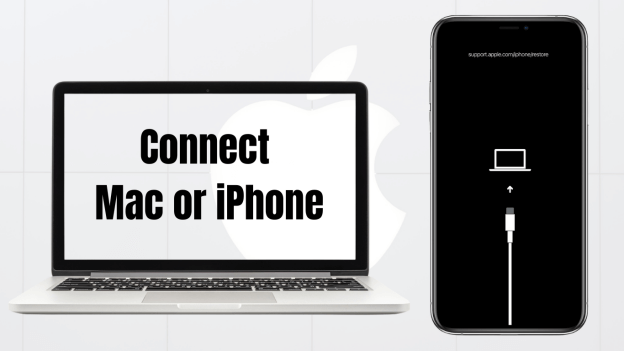
The recovery mode enables you to erase the iPhone and set it up again after it has been erased. The data and settings of your iPhone can be restored from a backup after you erase it. In case you didn't back up your iPhone, you can set it up as a new device and download your iCloud data.
Part 3. How to Recover Data to iPhone That Lost Due to "Attempting Data Recovery" Error?
A failed attempting to recover data iphone could result in the loss of all files. It is possible to restore earlier backups to your iPhone if you have created backups in iTunes or iCloud.
However, backup restoring will erase all the data currently stored on the iPhone or iPad. Thus, iFindit iPhone Data Recovery is ideal for retrieving lost data from iPhones and backups.
1. Restore iPhone Data with iFindit Recovery Software
Many users do not make daily backups of their phone data, but there is a tool called iFindit that does iPhone data recovery without backups. All types of data loss scenarios can be recovered, including factory resets, permanent deletions, and accidental deletions. You can recover data using iFindit in a few simple steps.
- Supports 18+ Data Types: It could recover various types of lost data, including notes, photos, videos, WhatsApp data and so on.
- Without Backup: It could recover your lost call history or other lost data directly from iOS devices without any backup.
- Preview Before Recovery: Once it completes the scan, you can preview the recoverable data before downloading it.
- Strong Compatibility: It supports almost all iOS devices (iPhone, iPad, iPod) and is compatible with almost all iOS versions (including iOS 16/17).
- Fast and Deep Scanning: It scans your iPhone thoroughly and quickly and offers a high recovery rate.
- User-Friendly: It offers an intuitive click-based user interface that requires no technical skills to use the tool.

Secure Download
An iOS device can be recovered by following these steps:
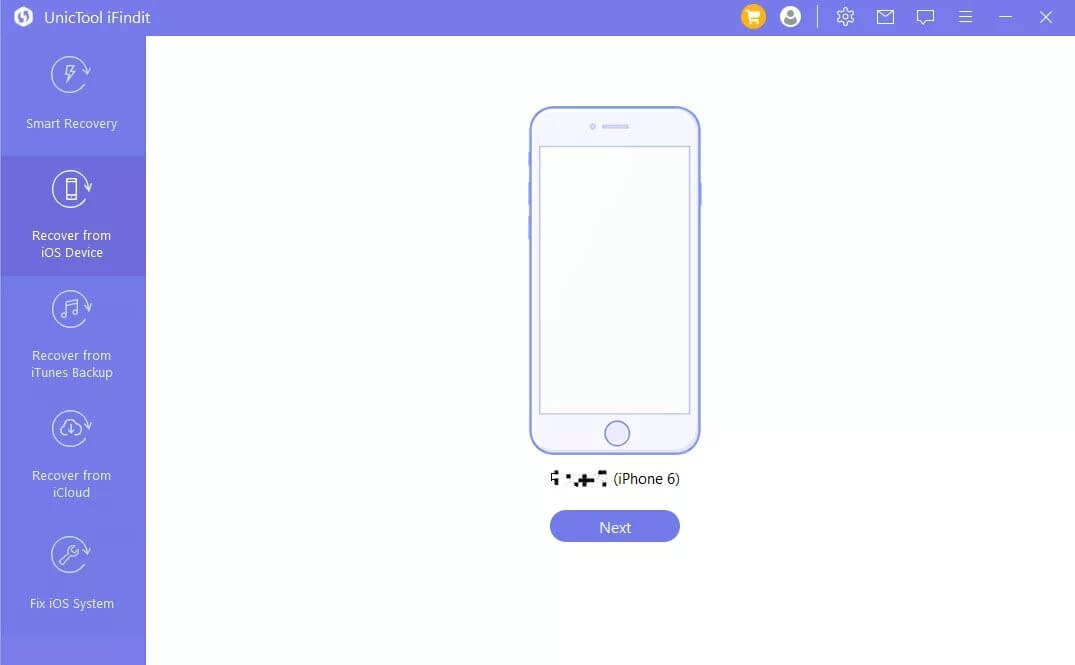
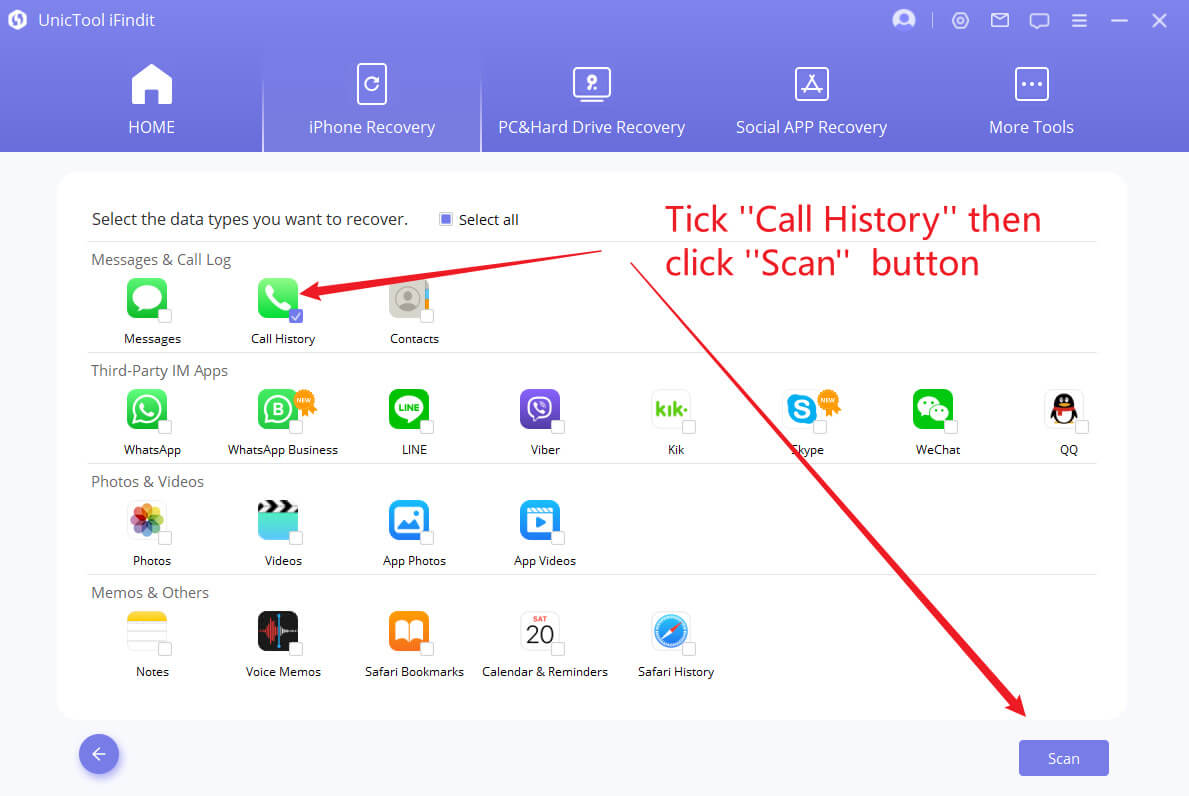
- 1 Install the iFindit software on your Mac or Windows computer. As you don't have a backup. Connect your phone with a lightning cable to your PC, then choose "Recover from iOS Device."
- 2 When iFindit detects your iPhone, click on Next, and you will see all the data that can be recovered.3. You can choose which type of data you want to recover. Then click "Scan."
- 3 Once the scan has been completed, select all the files you wish to recover and click the “Recover button.” Then you'll be able to enjoy your lost data once again!

2. Restoring iPhone Data from iCloud Backup
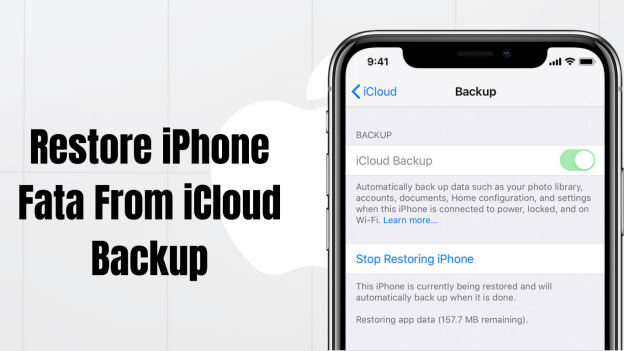
The data on your iPhone could be recovered from iCloud backups if you reset your iPhone after trying to recover data.
- 1. Once you reach the Apps & Data screen, select “Restore from iCloud Backup."
- 2. Then sign in to your Apple ID.
- 3. After select the latest backup and click on “Restore button.”
3. Restoring iPhone Data from iTunes Backup
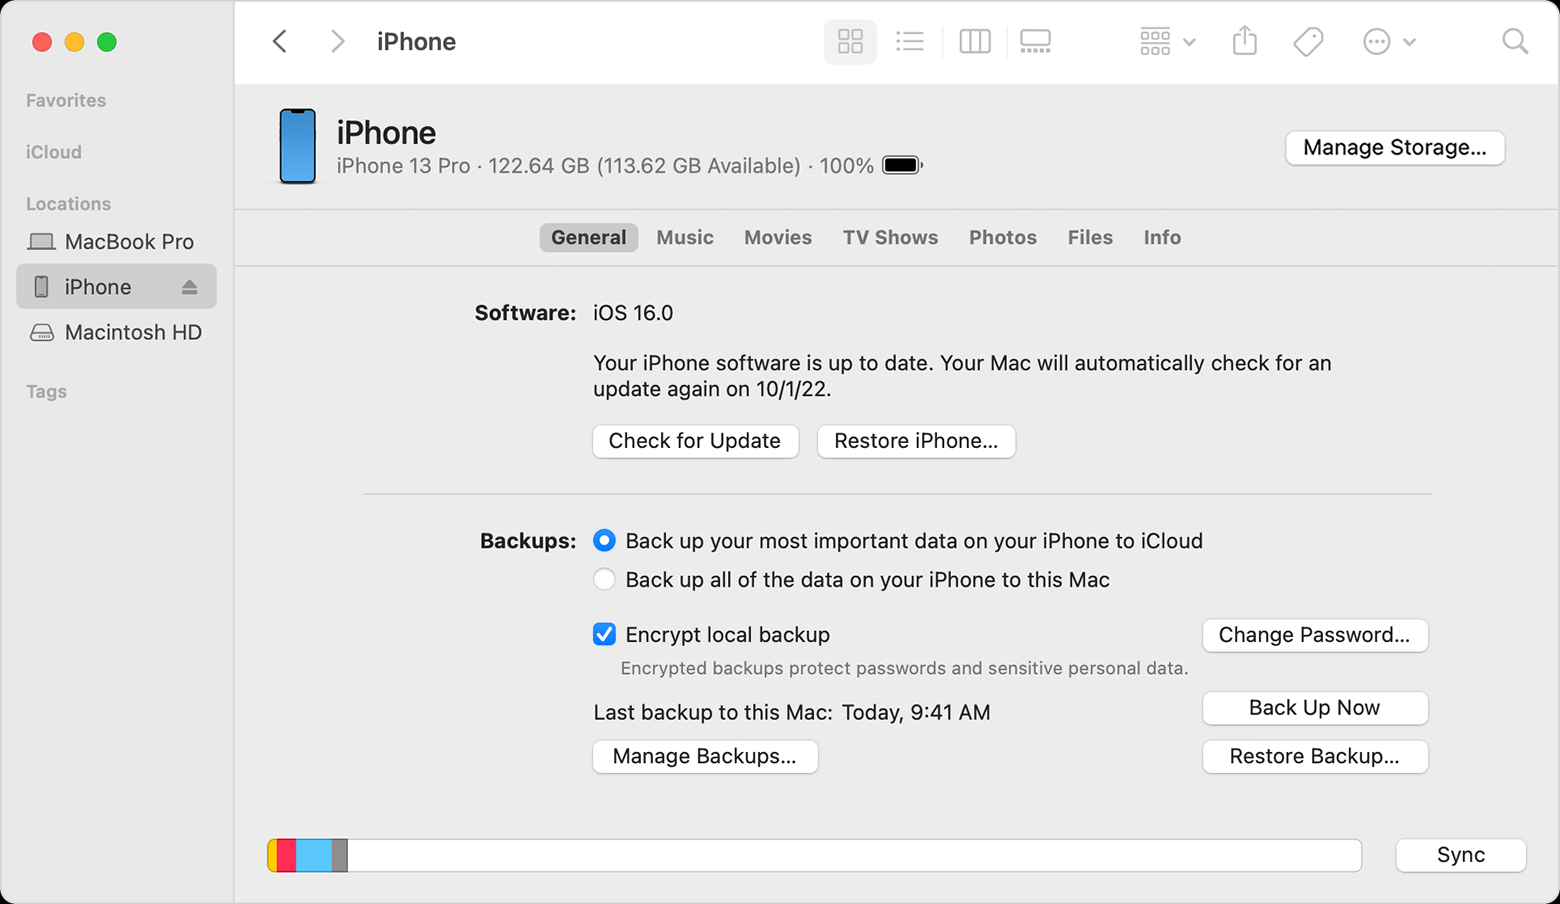
Here are the simple steps to restore lost data from iTunes Backup:
- 1. If you have made a backup of your iPhone using iTunes before, connect your iPhone to the same computer you used to do the backup.
- 2. The Backups menu can be accessed by clicking the device icon and selecting "Restore Backup."
- 3. You can restore a backup by selecting the most recent backup and clicking “Restore" and confirm it.
Conclusion
Let's say an update error occurs or iPhone data detect data recovery in the future. If this happens, force restarting your iPhone and restarting in recovery mode should fix the problem and result in the iPhone no longer showing the "iphone Attempting data recovery" error. Meanwhile, a regular backup via iTunes or iCloud is one of the most crucial ways to prevent iPhone data loss. The iFindit Tool is an ideal option for backing up your iPhone's important data selectively or fully. So, you don't need to worry about iPhone upgrade bugs affecting your data.Try it out today!(use iFindit).
Secure Download


