Having all of your browsing histories on your iPad might be useful at times, especially if you want to remember which websites you visited on a specific day and time. Or you might want to return to a website you once visited but can't remember the URL.
However, deleted history of your browser, whether purposefully or unintentionally, might cause problems.
But don't be scared!
There is still hope of recovering erased browsing history. Let us go through three techniques for checking the deleted history on an iPad.
Part 1.How Long Do iPhone Stores Call History?
Part 2. How to View Call History on iPhone?
Part 1.Best Way to Check History on iPad after Deleted
As you are aware, your deleted Safari history will be retained on your device for a period of time, giving you the opportunity to retrieve it. As a result, you may be more worried about how to recover Safari's history. Just keep reading.
You might use iFindit to retrieve your deleted safari history even if you did not save it to iCloud or iTunes. That sounds cool. Isn’t it? iFindit is a program for recovering lost files on your iPhone / iPad, such as browser history, notes, videos, WhatsApp chats, and text messages. We advocate this strategy since it is simple to implement and does not result in data loss.
Other features that distinguish iFindit include:
- Supports 18+ Data Types: It could recover various types of lost data, including notes, photos, videos, WhatsApp data ,Safari History and so on.
- Without Backup: It could recover your lost call history iPhone or other lost data directly from iOS devices without any backup.
- Preview Before Recovery: Once it completes the scan, you can preview the recoverable data before downloading it.
- Strong Compatibility: It supports almost all iOS devices (iPhone, iPad, iPod) and is compatible with almost all iOS versions (including iOS 16).
- Fast and Deep Scanning: It scans your iPhone thoroughly and quickly and offers a high recovery rate.
- User-Friendly: It offers an intuitive click-based user interface that requires no technical skills to use the tool.

Secure Download
To retrieve your deleted safari history using iFindit, follow these steps:
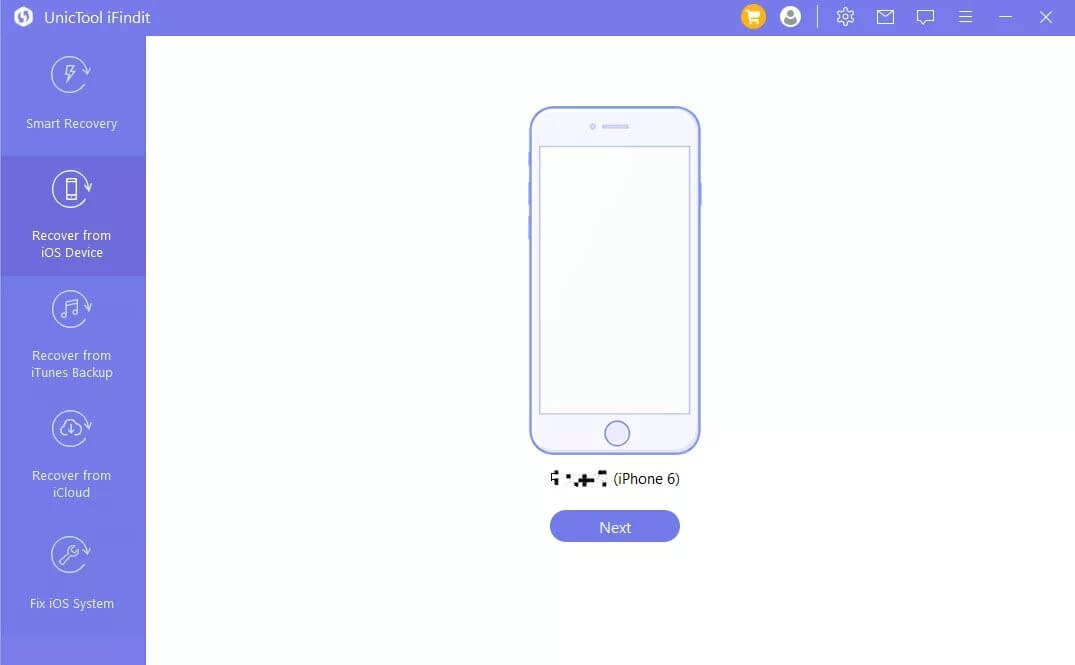
- 1iFindit may be downloaded and installed on your Mac or PC. Then, Select the "Recover from iOS Device" mode when you launch the software. Join your iPhone to your PC.
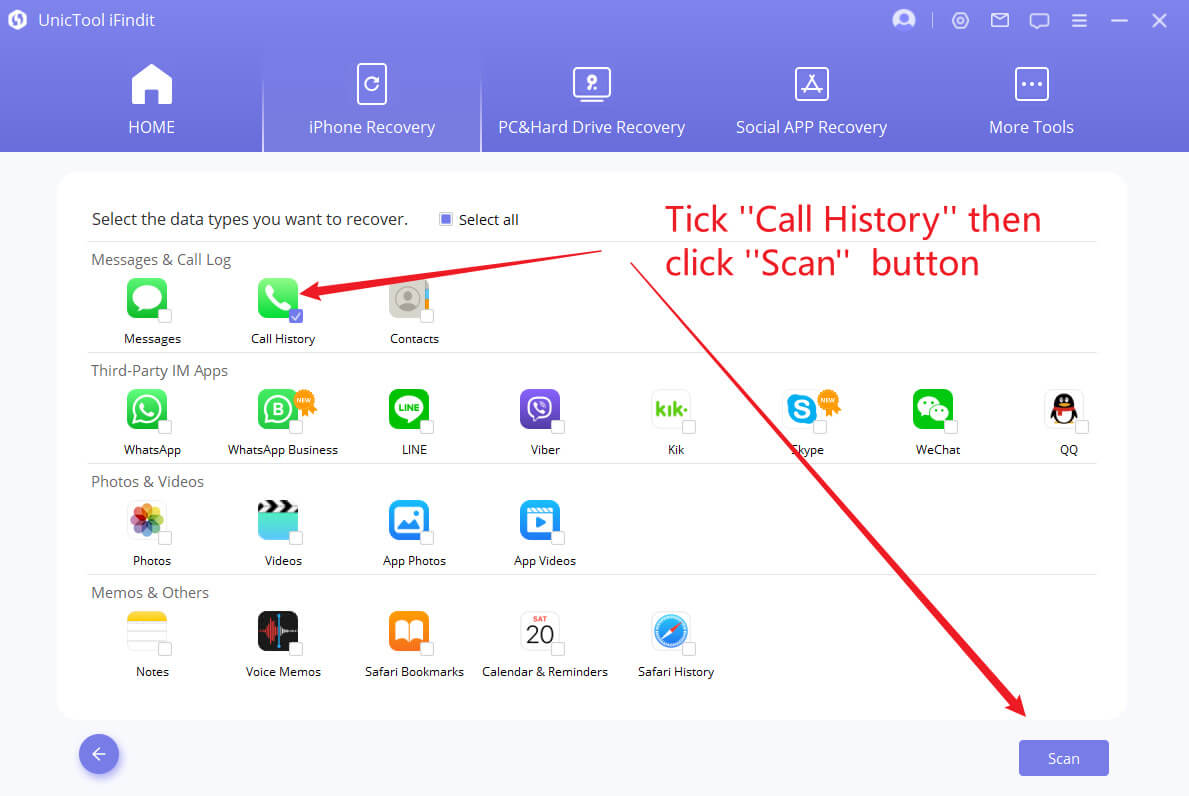
- 2 After your iPhone has been properly recognized, select "Next" to proceed. Choose ✅ "Safari History" here. When you press the "Scan ?" button, iFindit will scan your iPhone's memory for your entire Safari history.
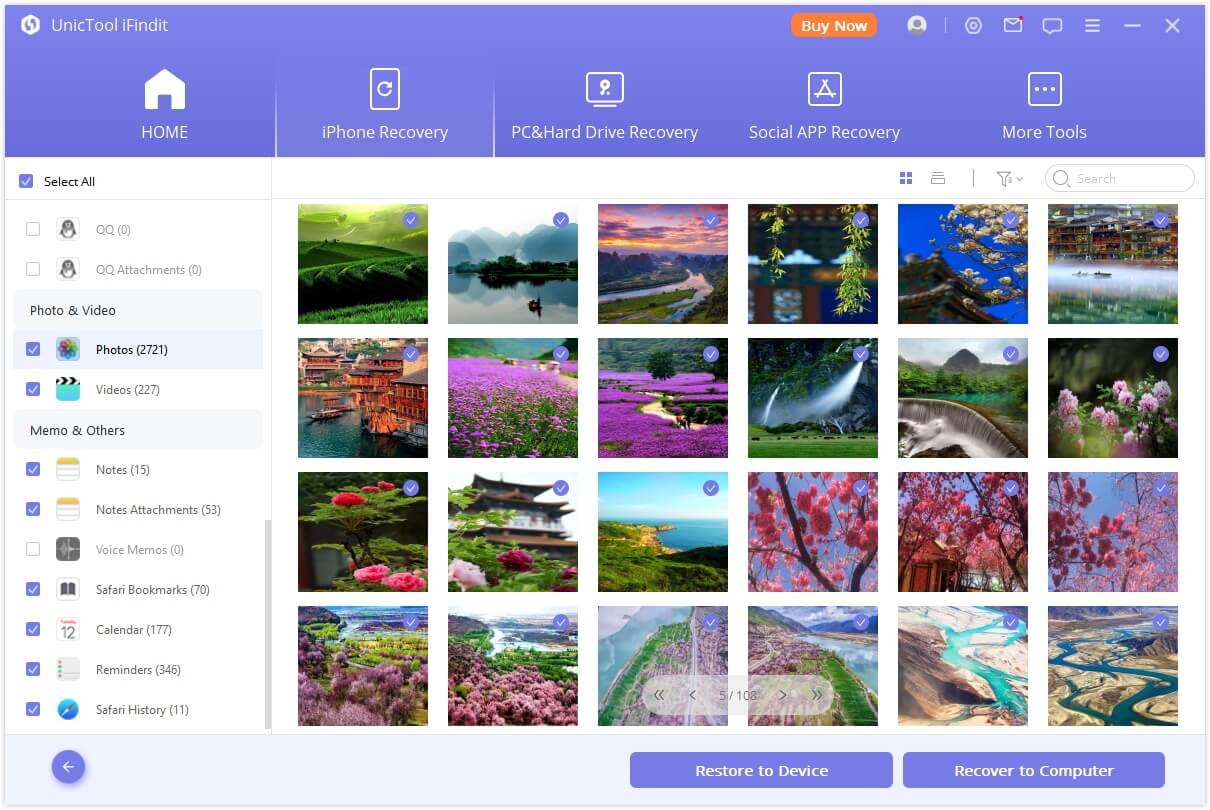
- 3 After the scan is complete, click "Recover" and select a location to save the files. After the recovery procedure is completed, all browsing history will be recovered.
Part 2.Recover Safari History from iTunes Backup
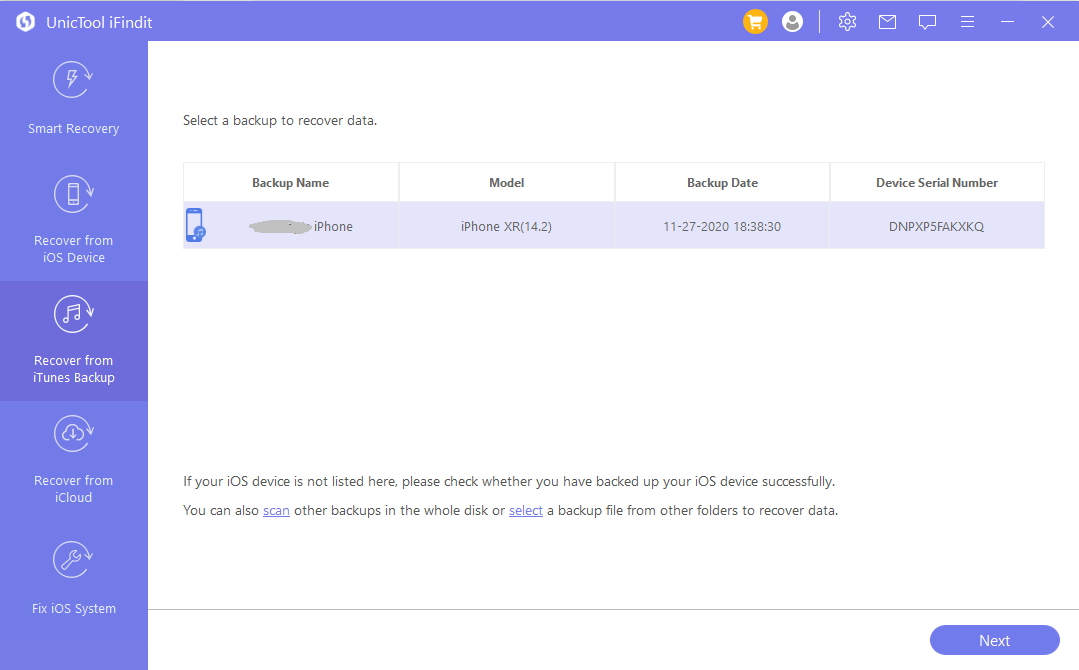
Secondly, if there is a pre-made backup, it will be more convenient for you. iFindit helps you to restore the Safari history from an iTunes backup in a few simple steps.
- 1Download and launch the iFindit data recovery tool on your PC.
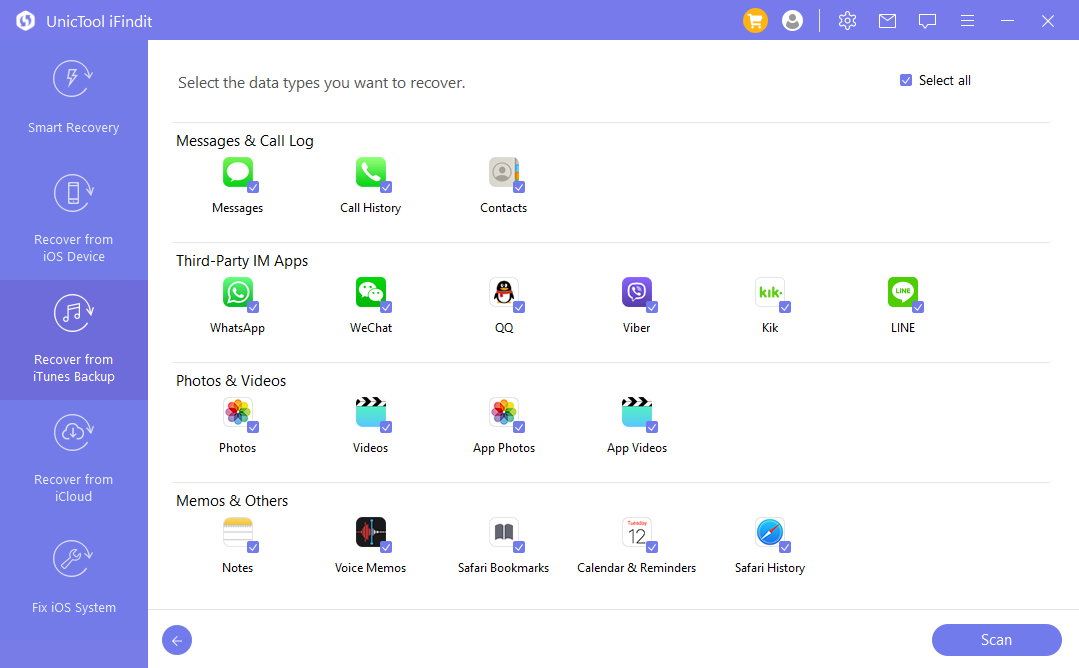
- 2 On the left, select "Recover from iTunes" and choose Safari and any other app you want for data recovery. Then click on "scan ?".
- 3 It will find out all the previous backup files ?. Choose one folder that is holding your lost Safari history.
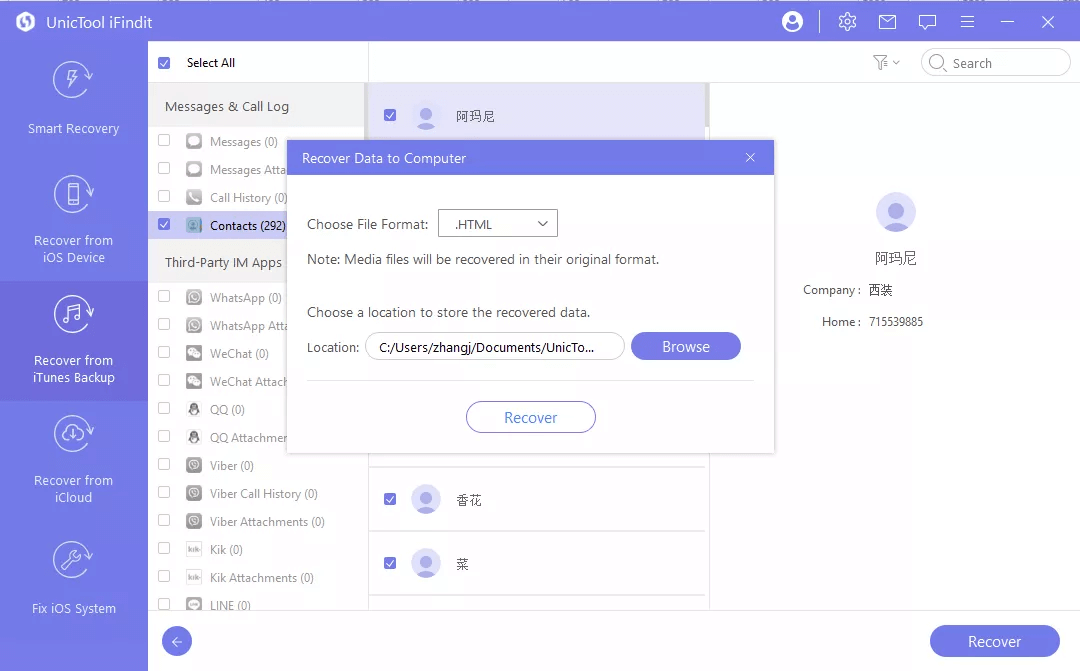
- 4Lastly, select the most pertinent ones, and confirm the destination before pressing "Recover" to save them.

Part 3.Recover Safari History from iCloud Backup
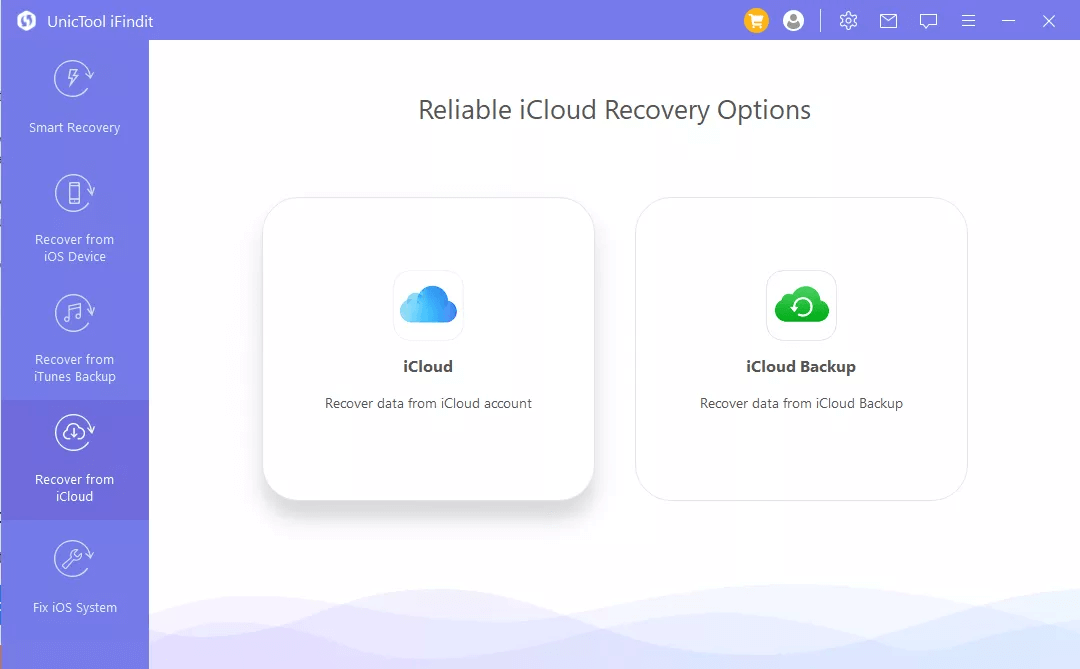
Please check that you have enabled iCloud backup in Settings before attempting to retrieve the Safari history. Then, you may use iFindit to retrieve the lost Safari history from an iCloud backup in a few minutes.
- 1Install and run the iFindit data recovery software on your PC.
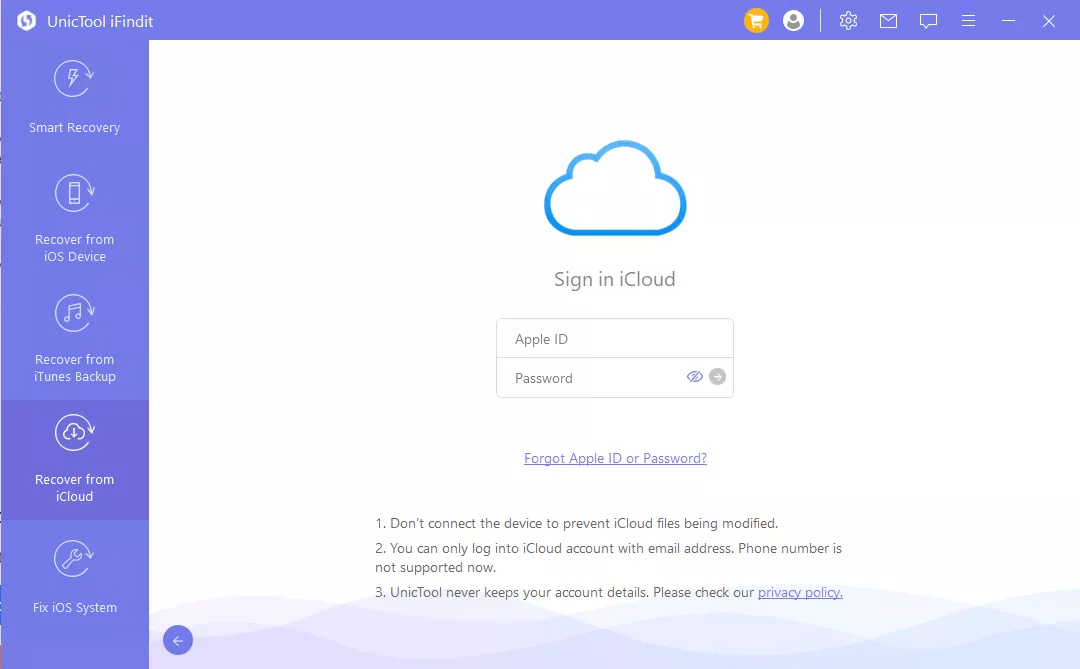
- 2 On the left, select "Recover from iCloud Backup".
- 3 Log in to your “iCloud Account” by submitting the “Apple ID” credentials to see all of your backup files.
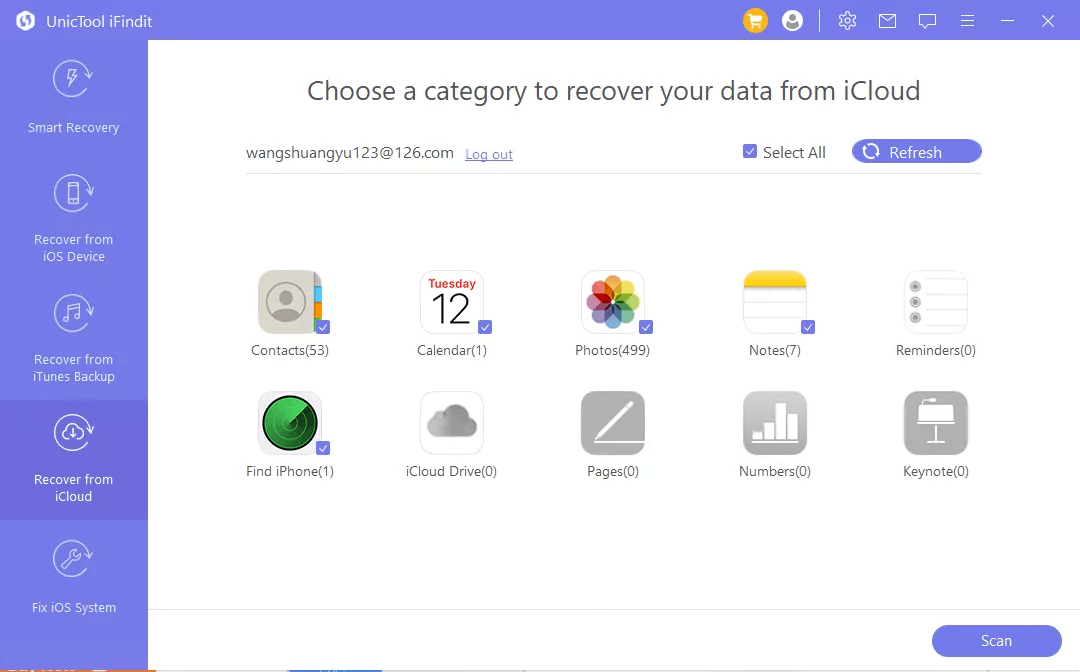
- 4Choose the most relevant “Safari history” to restore and begin scanning.
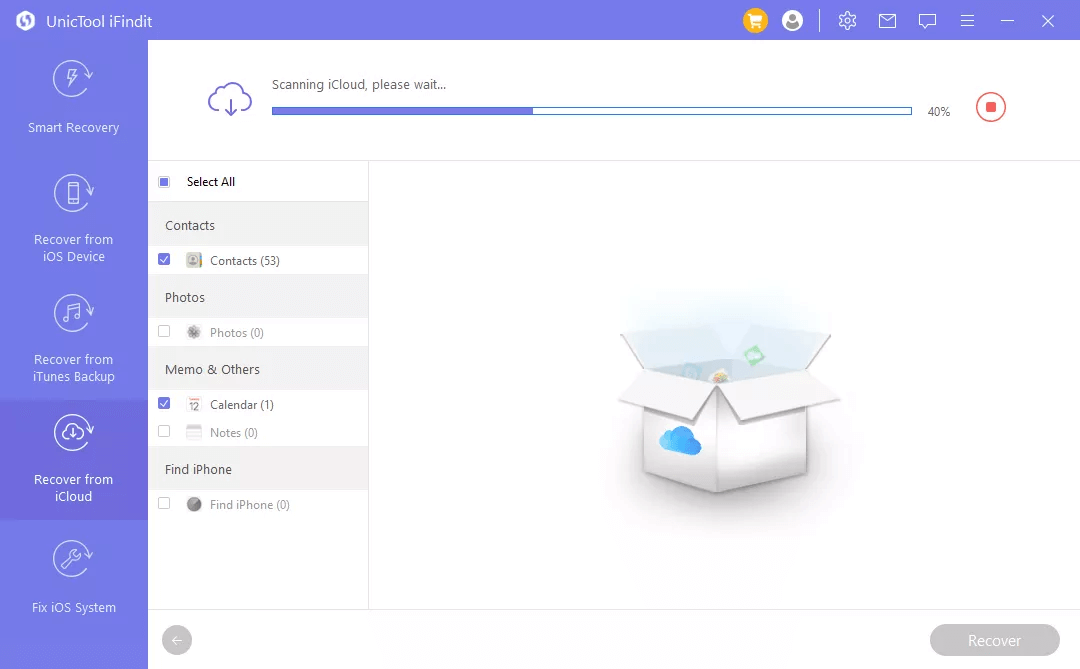
- 5Click on recover by selecting the files and starting the backup extraction process. Once the process is completed, you can view it.

FAQs about Recover Deleted History Chrome
1.Why did chrome history disappeared, not tracking history?
Here's how to fix it if Google Chrome's browsing history has vanished or is no longer visible. To solve the problem with the Chrome browser, you must first verify three items. We've compiled a list of all available alternatives to ensure you always have access to your browser history.
- 1Check Chrome Settings
- 2Examine Group Policy
- 3Modify the Registry value
These are the top 3 ways to prevent history from disappearing from your Chrome browser.
In addition, you should be aware that browsing in Incognito or Private mode in Google Chrome or any other browser does not result in the storage of browsing data. You are wasting your time attempting to retrieve such data.
2.Is There Any Official Way to Check Deleted History on iPad?
Apple allows customers to back up their devices via iCloud and iTunes; thus, there is an official way to access erased history on iPad. However, there are some clear drawbacks to the three methods for checking and restoring Safari browser history. Please do a quick check here.
1.Restore Whole iTunes Backup
If you already backed up your smartphone to iTunes, you may obtain the backup, which includes Safari history.
- 1Open iTunes and connect your iPad to the computer.
- 2Select your iPad and then go to the Restoring option.
- 3Choose the right backup file from the list and press the "Restore" button.
The iTunes backup will be restored automatically. When you restore the backup, all of your iPad's existing data is wiped and replaced with the restored data. iTunes does not enable you to examine the backup material before restoring it. You may restore the incorrect backup, in which case you will be unable to access any Safari history.
2.Restore Bookmarks from iCloud.com
To restore the iCloud backup, ensure you have activated the iCloud backup on your device.
- 1Sign in to iCloud.com using your “Apple ID” and “password”.
- 2Click Settings, then "Restore Bookmarks" in the Advanced section.
- 3Select the most suitable bookmark archive and go to the restore option.
- 4There will be a new information pop-up. Click "Restore" one more.
- 5When the procedure is completed, you will be able to view the erased history on your iPad again.
Tip:Check that your Wi-Fi network is robust and that your internet speed is enough. Safari history will be lost permanently due to fluctuating Wi-Fi.
It is not feasible to retrieve deleted browser history on iPad selectively since the entire device data on iPad is restored, including your previous safari history.
3.Why choose iFindit instead of Official iTunes/iCloud?
Using iFindit instead of iTunes or iCloud to restore Safari history allows you to perform the process more quickly and safely. Instead of restoring complete backups, this tool recovers only the ones you need while keeping all current data intact.
Conclusion
Depending on your scenario, you may use any of the three techniques we've covered to check the history on your iPad after deletion. The only data that can be recovered via iCloud is bookmarks. Overall, utilizing iFindit is the most dependable approach for checking and recovering all of your lost Safari histories. This approach also does not need you to have previously created a backup. So, download it immediately to examine your iPad's erased history in no time.
Secure Download

