Have you ever encountered 'the iPhone could not be restored, the device cannot be found' message? This error will occur when you try to restore your phone on iTunes, preventing you from completing the process. And various reasons may cause this message to appear.
In this article, you are going to explore the reasons behind iPhone could not be restored when you are restoring or updating your iPhone to the newest iOS 16 and learn how to fix it.
Part 1. Why It Says 'iPhone Could Not Be Restored'
Part 2. How to Solve the 'iPhone Could Not Be Restored' Issue?
Part 1. Why It Says 'iPhone Could Not Be Restored'
In essence, when you see "the iPhone could not be restored, the device cannot be found" message, it is a sign that the connectivity between your iPhone and computer isn't good. You might see this message because the cable you are using is old and faulty, or because you haven't updated your iTunes to the latest version.
Moreover, this issue might appear when there are some glitches in your operating system. Luckily, there are many solutions to this issue. Just keep reading.
 Secure Download
 Secure Download
Part 2. How to Solve the 'iPhone Could Not Be Restored' Issue
Below, you will find the 9 most effective ways that can fix "the iPhone could not be restored, the device cannot be found" error.
1. Switch to the Original USB Cable
3. Update Apple Mobile Device USB Driver
4. Unintall the Security Software or Turn off the Firewall
7. All-in-One iOS Repair Tool: Umendit
1. Switch to the Original USB Cable
As we have already mentioned, this message appears when there is no or poor connectivity between your iPhone and your PC. Therefore, the first thing you should try is to check the USB cable you are using. Make sure that you have a cable that is certified by Apple. Furthermore, don't forget to try the different USB ports on your computer.
2. Update iTunes
One of the most common causes for "the iPhone could not be restored, the device cannot be found" message is that iTunes is outdated. For this reason, if you get this message, check for the available iTunes' updates and install them.
If you use a Mac computer, you can find the available updates on the App Store.
On the other hand, to check for updates on a Windows computer, you have to launch iTunes and find the "Check for Updates" option on the "Help" menu.
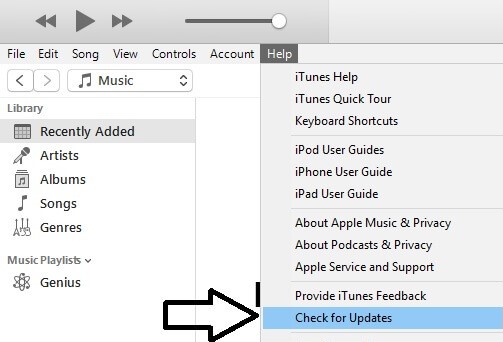
If you don't find "Check for Updates" option on Windows computer, then you must download it from Microsoft Store, which will update it automatically.
3. Update Apple Mobile Device USB Driver
Another cause for this message is using outdated drivers. This software installed on your computer allows connectivity with your devices. Therefore, you need to regularly check and update this driver.
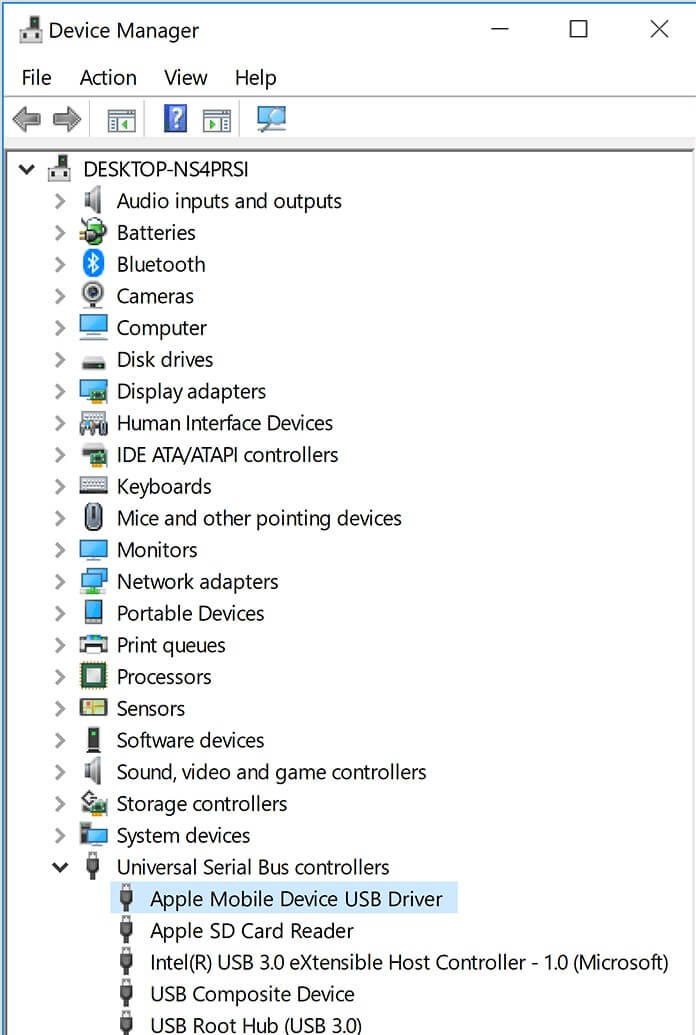
- Press the Windows and R key on your keyboard to open the Run command.
- In the Run window, enter "devmgmt.msc", then click OK to open Device Manager.
- Locate and choose the Universal Serial Bus controllers section.
- Look for the Apple Mobile Device USB driver and right click it for Update option.
- Click Update and then confirm your action.
- Press and hold the Power and Home buttons on your iPhone simultaneously.
- Keep holding them, until the Apple logo appears on your device's screen.
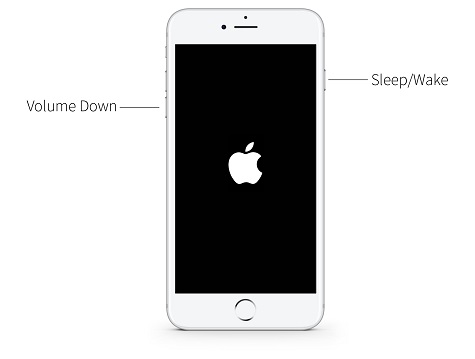
- Press and hold the Power and Volume Down buttons at the same time.
- Don't let go of them, until you can see the Apple logo on the screen.
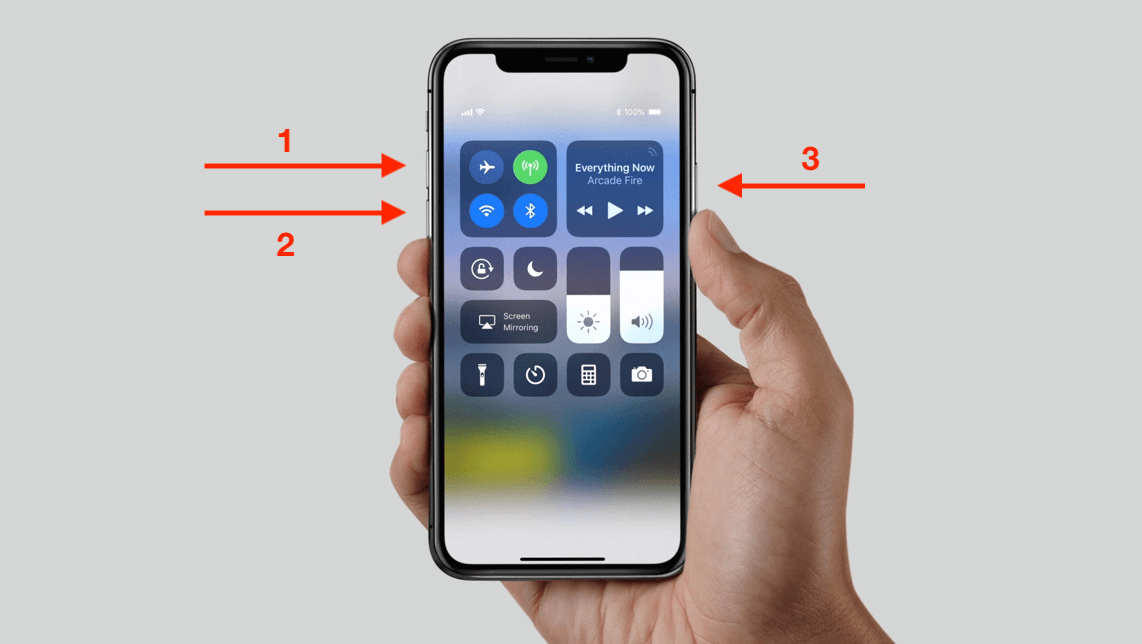
- Quickly press and release the Volume Up button.
- Quickly press and release the Volume Down button.
- Then, find the Power button and keep it pressed, until you see the Apple logo on your device.
- Just one click to enter or leave recovery mode.
- Erase and reinstall all the data without iCloud password
- Fix 150+ iOS issues without data loss
- Downgrade iOS without jailbreak
- Supports the latest iOS version, iOS 16.
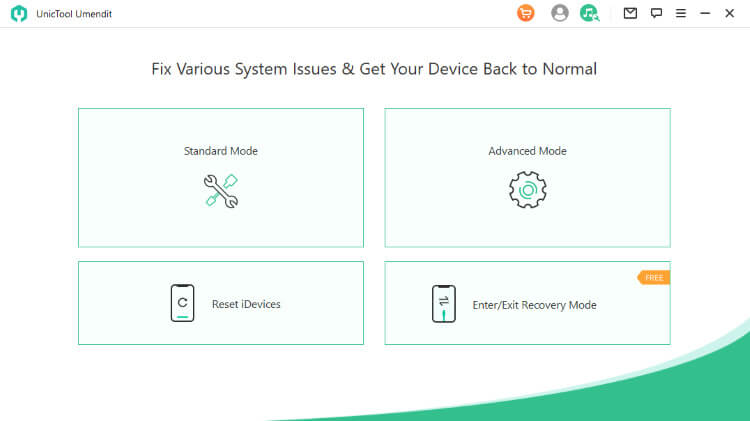
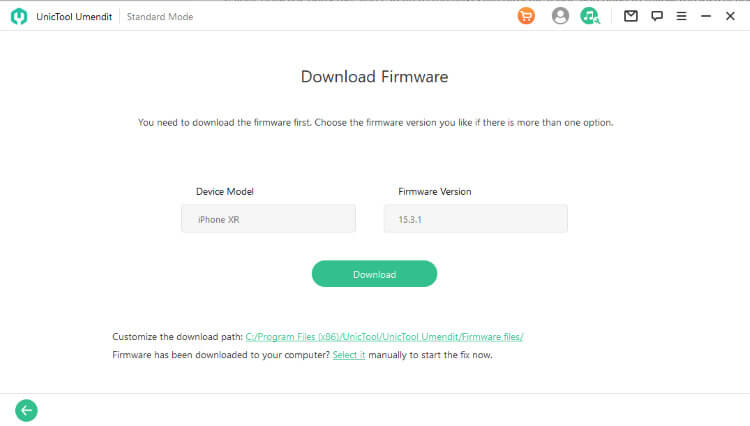
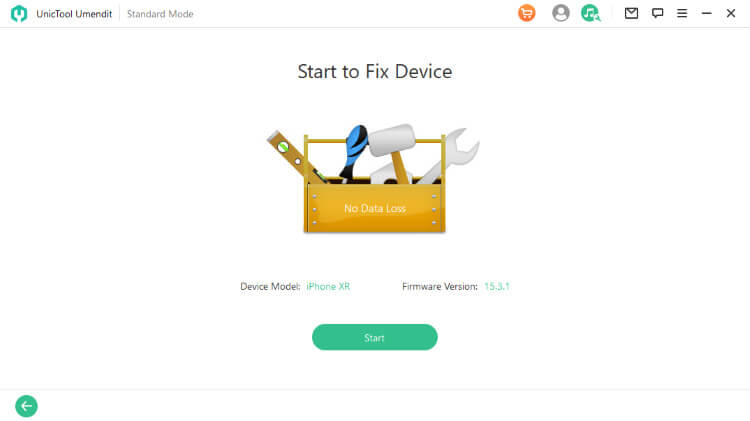
- 1 Choose "Standard Repair" from the main interface.
- 2 Connect your device to your computer with a USB cable. Once Umedit automatically detects it, you will be taken to the next step. And if your iPhone can not be recognized, you need to follow the steps on the screen to put your iPhone into DFU mode or recovery mode.
- 3 When your device is in recovery or DFU mode, you can see various firmware that are compatible with your iPhone. Choose the one you like and click on "Next" button.
- 4 After that, Click the "Start" button to fix the error. Wait, until the process is completed.
- 1. Press the Power and Home buttons on your device simultaneously for approximately 8 seconds.
- 2. Then release the Power button but continue holding the Home button for at least 5 seconds.
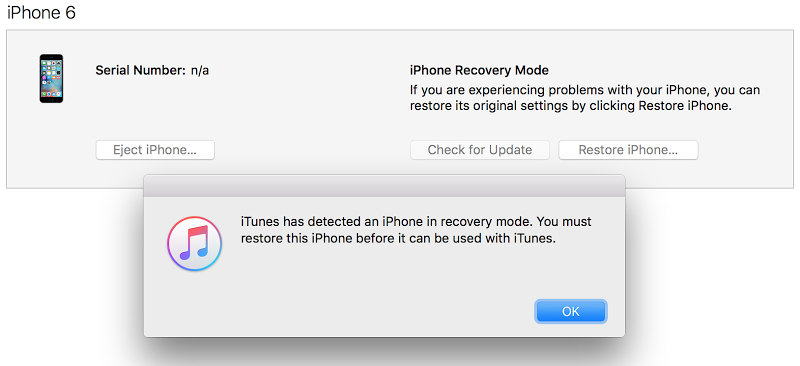
- 3. The black screen means you succeed. And you will see a window saying that it has detected an iPhone in recovery mode.
- 1. Press and hold the Volume Down button and Side button together for 8-10 seconds.
- 2. Then, release the Side button but continue holding the Volume Down button for at least 5 seconds.
- 3. The black screen means you succeed. And you will see a window saying that it has detected an iPhone in recovery mode.
- 1. Quickly press and release the Volume Up button, then quickly press and release the Volume Down button.
- 2. Then, press and hold the Side button, until the screen goes blank.
- 3. As soon as the screen turns black, press and hold the Volume Down button, without releasing the Power button.
- 4. After about 5 seconds, release the Power button, while still holding the Volume Down button, until iTunes detects your device in recovery mode and your iPhone stays in black.
4. Uninstall the Security Software or Turn off the Firewall
One more thing that can cause this error is the security software you are using. It is very common for firewalls or antivirus programs to disrupt the connectivity between your computer and your iPhone.
To fix the issue, try to uninstall your security software or turn off the firewall. If the issue disappears by this way, you can reinstall those software and turn on firewall after restoring your iPhone.
5. Restart Your Computer
Another simple solution to this common error is to restart your computer. Sometimes, your device might be slowed down by high CPU usage or a huge number of cache files temporarily stored in it. Therefore, you may solve this issue by restarting the PC.
6. Force Restart Your iPhone
The next method that can fix this error you have got is to force restart your device. In general, this method can often solve many issues that you might encounter on your iPhone, and so, you should know how to do it. The force restart method is slightly different, depending on the iPhone you own.
To force restart your iPhone 6 or prior, you have to follow the process below:
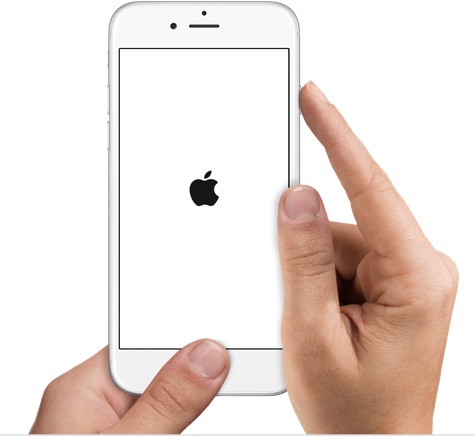
To force restart an iPhone 7 and 7 Plus, you must follow these steps:
If you own an iPhone 8 or later, you have to force restart it in this way:
7. Umedit – the All-in-One iOS Repair Tool
All of these methods have the possibility to fix the “the iPhone could not be restored, the device cannot be found” issue. However, if you want to find the most reliable and effective way, then you have to try the all-in-one iOS repair tool, UnicTool Umendit.
The best thing about this software is that it is extremely user-friendly, has a high success rate, and you won't risk losing your data. Besides, this tool works well on all iOS versions, including the newest iOS 16.

Fix iOS System Issue
73,128 downloads
100% secure
The first step to start using it is to get Umedit on your computer. Once you have launched it, you can solve any issue on your iPhone with this process:
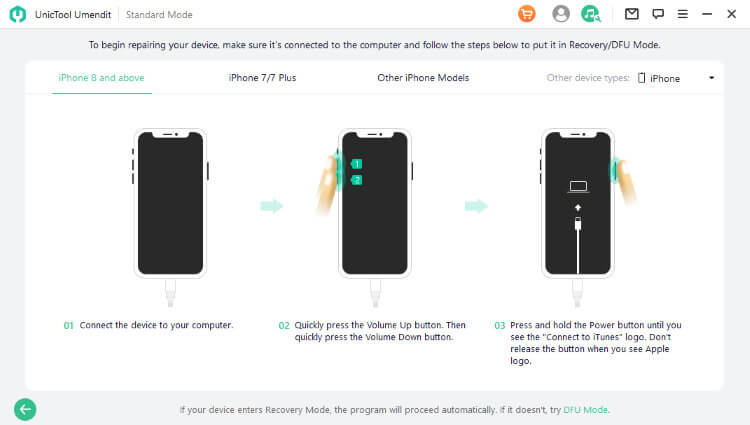
8. Restore iPhone with Recovery Mode
If you want to try some self-applied methods, you can put your iPhone in recovery mode and restore it again. This is a general way when Apple users meet with iOS issues. Follow the steps below to put your iPhone into recovery mode first. And you need to keep the iPhone connected with computer in the whole process.
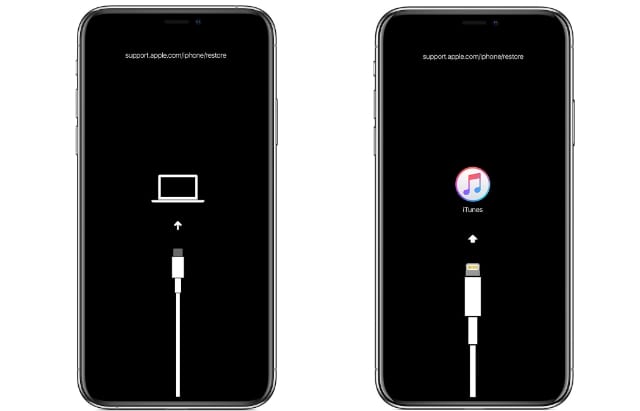
If your device is an iPhone 6 or earlier, you must press the Home and Power buttons simultaneously. Don't let them go when you see the Apple logo. Keep pressing until the recovery mode screen shows.
If you have an iPhone 7/7 Plus, you must press and hold the Volume Down button as well as the Power button. Keep holding when the Apple logo is displayed. Release the buttons when the recovery mode screen appears on the screen.
If you have an iPhone 8 or later, then you must press and release the Volume Up button, then the Volume Down button, and finally, press and hold the Power button. Keep holding it until you see the recovery mode screen. Don’t release the button when the Apple logo appears on your device.
After entering recovery mode, you can see a pop-up window showing Update button and Restore button. Choose Restore and follow the prompts to finish the whole process.

9. DFU Restore via iTunes
The last method is to restore your device with DFU mode. You should think twice as this way may cause some potential risks. To do that, you have to put your iPhone in DFU mode first.
To put your device in this mode, you have to follow a different process depending on the device you own. No matter your device, first of all, you need to connect your computer and iPhone in the very beginning.
To put an iPhone 6 or prior in DFU mode, you need to follow these steps:
To put your iPhone 7 and 7+ in DFU mode, you have to follow this process:
To put your iPhone 8 or later in DFU mode, you can follow these steps:
Now, click OK and then restore iPhone. Wait patiently for the whole process to complete.
Conclusion
It's the end of this article, in which 9 methods are introduced to solve the issue "the iPhone could not be restored, the device cannot be found". All of these methods are proven effective to solve this common issue that appears on iPhones. However, the professional third-party tool Umendit stands out for its high success rate and no data loss feature. Moreover, if you have encountered iPhone Error 4013 when updating or restoring your device, there is more detail to solve iPhone could not be restored error 4013.You can become tech-savvy by the grace of the user-friendly interface. Just download it and give it a try!
 Secure Download
 Secure Download

