One of the fundamental roles that a phone does is making calls. It is very annoying when you try to make a call with your iPhone, and the person on the other side of the call can't hear what you are saying. Most of the time, this could be due to a network problem, but in some unfortunate cases, this issue occurs when there is a software or hardware problem related to your microphone.
If you have an issue with your iPhone microphone not working on calls or voice dictation, this article is for you. I will discuss the top 10 methods that you may use to fix your iPhone microphone not working issue. Let's dive in!
Part 1. Why is My iPhone Microphone Not Working?
Part 2. 8 Quick Fixes for iPhone Microphone Not Working Issue
- Method 1: Clean Up Your iPhone's Microphone
- Method 2: Test Microphone with Other iPhone Apps
- Method 3: Disconnect Bluetooth Devices and Headphones from iPhone
- Method 4: Disable Phone Noise Cancellation
- Method 5: Give apps permission to use a microphone
- Method 6: Restart your iPhone
- Method 7: Reset all settings on your iPhone
- Method 8: Update iOS version
Part 3. 2 Advanced Fixes for iPhone Microphone with Firmware Issues
Part 1. Why is My iPhone Microphone Not Working?
You know your iPhone microphone is not working when the people you call can't hear what you are saying or when the iPhone can't do voice dictation and Siri commands. Some of the common reasons your iPhone's microphone may not be working include:
- Software bugs: A glitch or bug in iOS could affect the operation of your microphone. This is common if you have just updated to a newer version of iOS that Apple hasn't fully refined yet.
- Physical damages to the microphone: Your microphone can get damaged if your iPhone encounters significant physical impact.
- Water damage: If you own an older iPhone (before iPhone 7 plus) that is not water-resistant, its microphone can easily get damaged if dropped in water or if you use it on a rainy day.
Part 2. 8 Quick Fixes for iPhone Microphone Not Working Issue
If you can't use Siri or send your friends voice notes, chances are high your microphone has an issue. Here are some quick fixes that you can use to fix the problem.
Method 1: Clean Up Your iPhone's Microphone
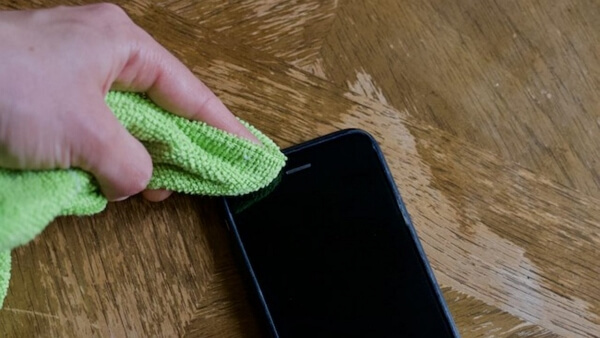
Your iPhone's microphone may not be working simply because of some physical debris or dust blocking it from picking up your voice. iPhones typically have two microphones; one at the bottom left of the phone and a receiver microphone built within the upper speaker. Clean both microphones with a dry cloth or a smooth toothbrush to clear out the dust or remove physical debris (if any).
Method 2: Test Microphone with Other iPhone Apps
It is possible that your microphone is not working due to a specific bug in the particular application that you are using. To rule out that possibility, test your microphone using several other apps and see if the issue persists.
For example, if your microphone is not working with Siri, try recording a voice note in iMessage or WhatsApp and find out if it picks up your voice with these apps. If the microphone works in other apps, then the issue is with the specific app where the mic is not working.
Method 3: Disconnect Bluetooth Devices and Headphones from iPhone
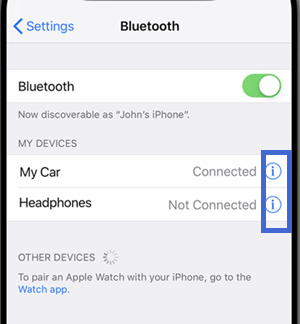
Having Bluetooth devices connected to your phone can also lead to the iPhone mic not working issue. Bluetooth devices, especially headphones, also have mics. So when these Bluetooth devices are connected to your iPhone, iPhone's built-in microphone is disabled, and your voice will be picked up by the microphones on your Bluetooth devices/headphones.
In addition, if the microphone on the headphones is faulty, it'll affect the function on your iPhone microphone. Therefore, go to your iPhone's Settings> Bluetooth and toggle to turn if off, and detach the headphones from your phone as well.
Method 4: Disable Phone Noise Cancellation
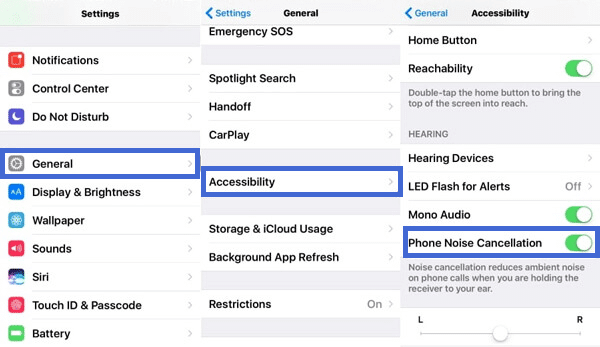
The noise cancellation feature on your iPhone filters out ambient sounds to make your voice clearer on calls and voice notes. However, if there is a bug in the operating system, this can easily mute all sounds, including your voice, whenever you use your microphone.
To disable noise cancellation, open Settings> Accessibility> Audio/Visual > Phone Noise Cancellation to turn it off if it is turned on.
Method 5: Give apps permission to use a microphone
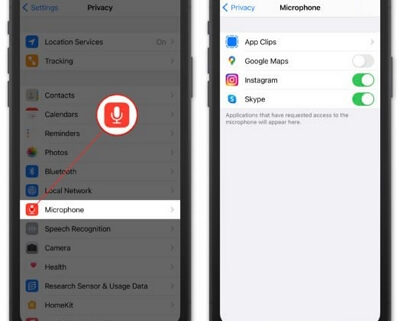
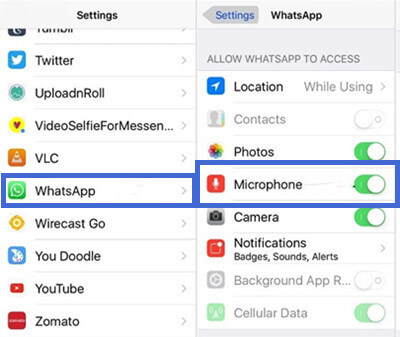
iOS is a privacy-centered operating which won't let any application use your microphone if not permitted by you. So if your microphone is not working in one of your apps, it could be because you've denied its permission to use your microphone. To fix this issue, open your iPhone Settings, choose the exact app you want to give microphone access, and then click on the Microphone toggle to turn it on.
Method 6: Restart your iPhone
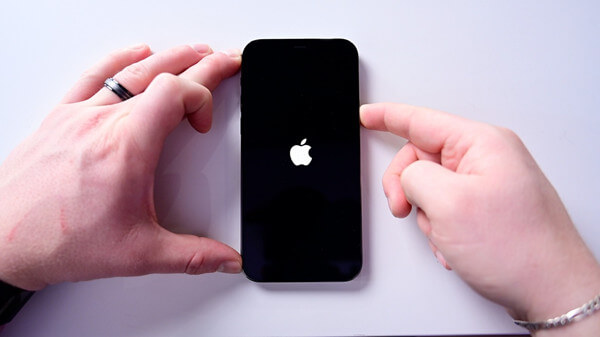
This is one of the most underrated fixes for most iPhone issues. If you have the iPhone microphone not working issues, restarting your iPhone should be one of the solutions you start with. Whenever you restart your phone, all the hardware devices, including the microphones, are reset. This can fix any issues that were stopping your mic from working normally.
Method 7: Reset all settings on your iPhone
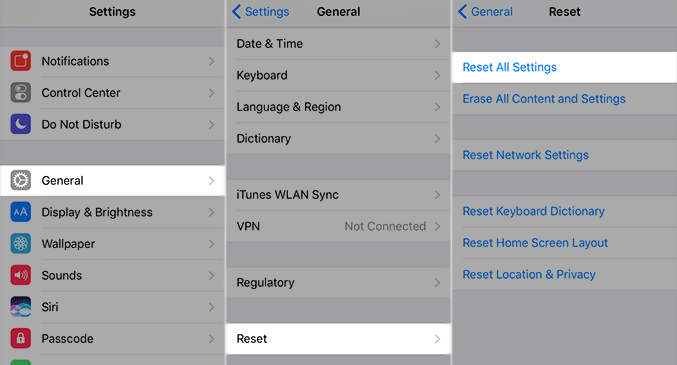
Your iPhone mic may not be working due to some settings that were altered out of ignorance. In such a scenario, resetting all your iPhone's settings back to the default could easily fix this problem. To reset all settings, open your iPhone Settings > General > Reset option > Reset All Settings. This will restart your iPhone with all its previous settings set back to the default.
Method 8: Update iOS version
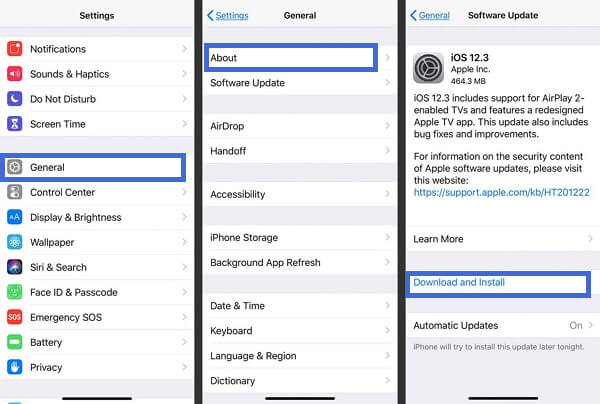
Apple recommends keeping your iPhone updated to get the latest features and fixes to bugs discovered in earlier versions. So if you are not running the latest version of iOS, you could be experiencing the iPhone microphone not working issue and you should update your iPhone.
Part 3. 2 Advanced Fixes for iPhone Microphone with Firmware Issues
If all the above ways don't fix your iPhone microphone not working problem, it could be that your iPhone is having some system issues. Troubleshoot your iPhone mic issue with these solutions:
UnicTool Umendit is a Windows and macOS application that you can use to fix any iOS software-related issues on your iPhone, iPad, iPod touch and Apple TV, including the system glitches that may cause your iPhone microphone not working properly. Luckily, with just a few clicks on your computer, you'll be able to troubleshoot the iPhone mic problem on your own!
Secure Download
Method 9: Use Umendit to Fix Any iOS System Issues ASAP
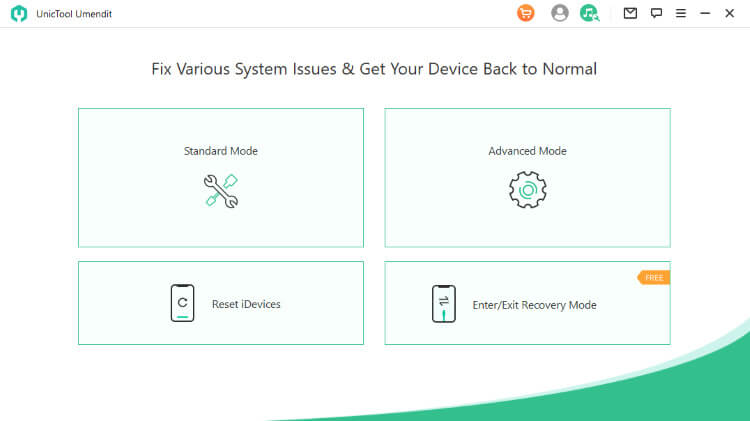
- 1 Download Umendit and install it on your computer. Once you are done installing, open the application and choose Standard Repairs.
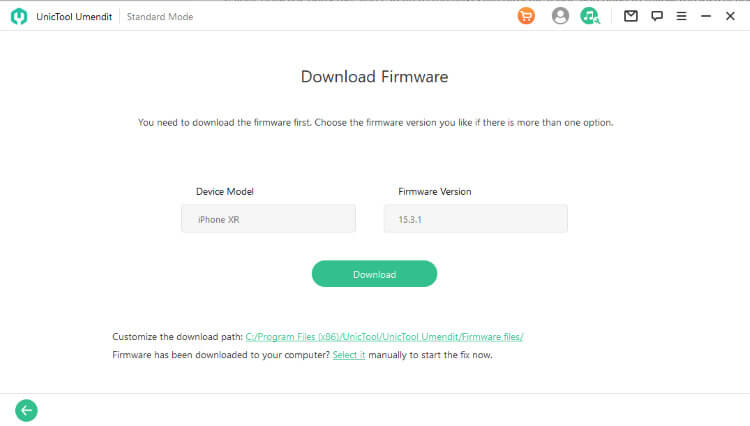
- 2 Download firmware for your iPhone. Once your device is detected, Umendit will automatically suggest the most suitable firmware you should download for it. Select the proper package and click Next.
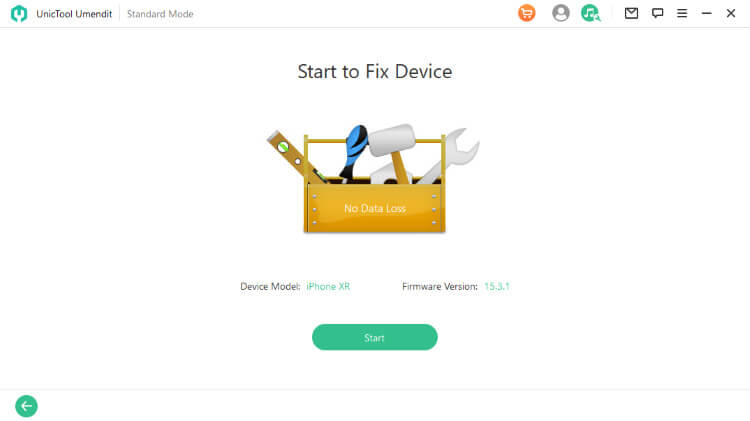
- 3 Start to fix iPhone microphone now working issue. When the firmware download is complete, you will see the Start button that you should click to kick start the Umendit process.
Connect your device, wait for it to be detected, and click next. If your device is not detected, you can follow the on-screen instruction to boot your iPhone into recovery mode.
After a few minutes, Umendit finishes the method and your iPhone will reboot. Then you'll find that the iPhone microphone not working issue has been fixed and the mic functions have been resolved back to normal.
Method 10: Last Resort - Fix iPhone Microphone firmware problem in DFU mode
If all the above options don't fix your microphone issue, you should opt for the device firmware update (DFU) method. This is the deepest software restore that you can do on your iPhone. To perform a device firmware update, you will have to put your iPhone in DFU mode and then restore it using iTunes (for Windows and macOS Mojave or earlier) or Finder (for macOS Catalina) and later.
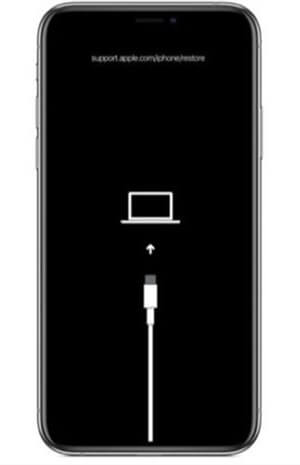
Follow these steps to put your iPhone in DFU mode:
For iPhone 7 and earlier models
- Plug your iPhone into your computer using a reliable cable. If you are using a Windows PC, make sure you install iTunes first.
- Press and hold the sleep/wake and the home button all at once. For iPhone 7, press and hold the sleep/wake button with the volume down button all at once for about 8 seconds.
- After 8 seconds, release the sleep/wake button, but continue holding the home button or volume down button (for iPhone 7) until your iPhone is detected in Finder.
- Release the home button or the volume down (for iPhone 7). Your iPhone will now be in DFU mode, and its screen will be black. You can now click restore on your iTunes or Finder to start the firmware updating process.
For iPhone 8 and newer model
- Quickly press and release the volume up button, then quickly press and release the volume down button. After this, press and hold the wake/sleep button until your phone's screen turns black.
- When the screen turns black, press and hold the volume down button while holding the wake/sleep button.
- After 5 seconds, release the sleep/wake button but continue to hold the volume down button until Finder/iTunes detects your iPhone. Boom!!! Your phone is now in DFU mode. You can now click restore to update its firmware.
Conclusion
We have covered almost every possible software solution to fix microphone issues with your iPhone. The choice of which method to use largely depends on the cause of the problem. However, it is best to start with simpler fixes like restarting your iPhone and cleaning the mics.
If the issue persists after the simpler fixes, the most reliable method you can use to solve this problem is using UnicTool Umendit to Troubleshoot the iOS system issues on your iPhone. This tool is very reliable and doesn't involve lots of technicalities like the DFU update method. Download Umendit now and give it a go!
You may be also interested in: How to fix when your iPhone call volume is low.
Secure Download
