iPhone is a premium mobile device with great functionalities to improve productivity and user experience. However, these devices sometimes experience some issues. If you are an iPhone user, you would at one time or the other notice that your iPhone won’t restore in recovery mode when you try to. If you face this problem, there is no need to put your device in the trash. Here are several ways to fix this problem. Read on to find out more.
Why Can't My iPhone Restore in Recovery Mode?
While trying to fix your iPhone, it is vital to understand key reasons why iPhone won't restore in recovery mode. Some of these primary reasons include the following:
- Hardware failure: One reason why your iPhone might not restore in recovery mode may be due to hardware failure. And the malfunctioning charging port is the most possible culprit. There are also some other issues which can be detected in an Apple authorized center.
- An unsuccessful attempt at jailbreak: When trying to restore an iPhone that has been jailbroken with iTunes, you might get a prompt that your device is ineligible. This implies that your phone can't restore in recovery mode.
How to Solve iPhone Won't Restore in Recovery Mode Problem
1. Switch to the Original USB Cable
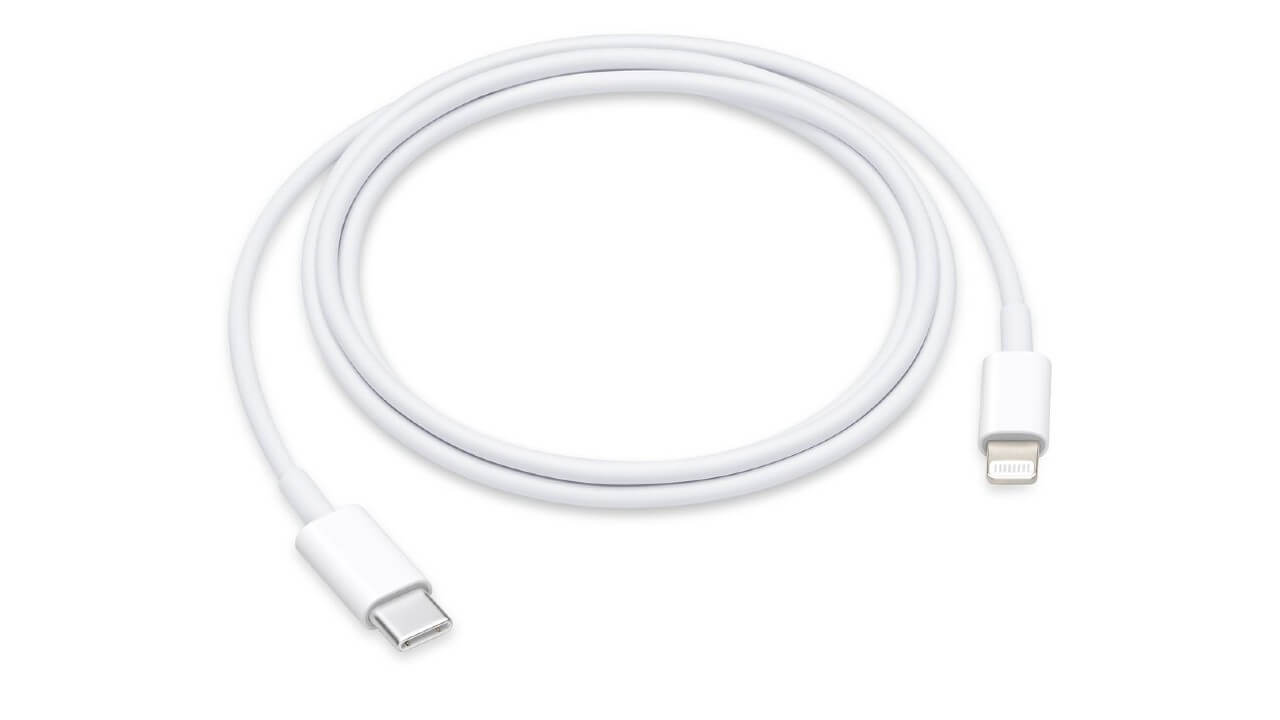
If your iPhone refuses to restore in recovery mode, there is a probability that the iPhone cable is damaged, or you are using the wrong cable. Make sure you use the original USB cable and use it to connect your iPhone with iTunes/Finder for a second try.
2. Restart Computer
Sometimes, the computer system may have some temporary bugs that can be solved by restarting. At this time, you should unplug your iPhone and shut down your PC. After 5 minutes, boot the PC and try to restore your iPhone again.

3. Update or Reinstall iTunes/Finder
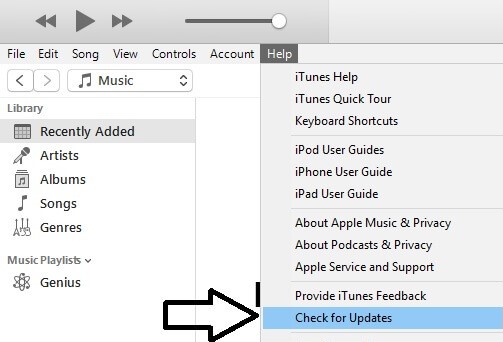
It is vital to ensure that you have the updated version of iTunes at all times on your system. An outdated iTunes/Finder might be the reason why your iPhone isn't restoring in recovery mode. To reinstall the iTunes, delete it first and then download it again from Apple website or Microsoft Store. To update the iTunes/Finder, just follow the steps below.
- For people who use iTunes, launch iTunes and click Help on the top lane, then choose Check for Updates and confirm your action. If there is no such option, then the software must be downloaded from Microsoft Store, and the Store will automatically update it for you.
- Mac users can simply open the App Store and click on Updates to check if there are available updates. Or update the MacOS as a whole, which will update the Finder as well.
4. Uninstall the Security Software on PC
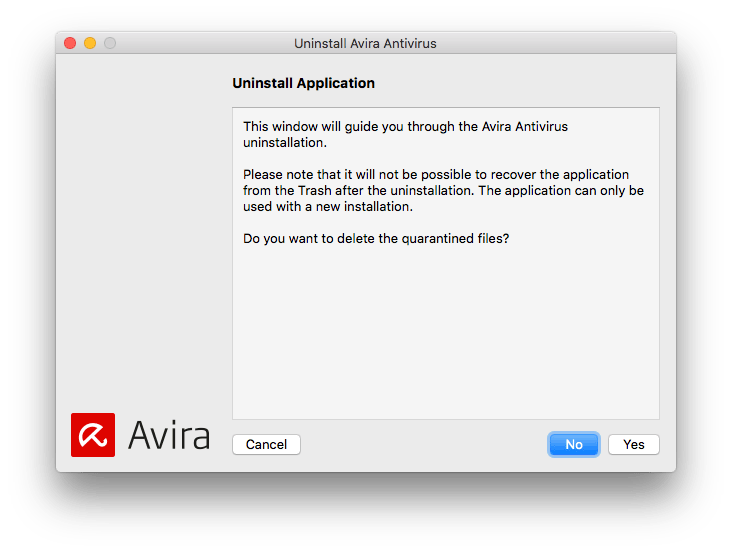
Another way to fix your iPhone that won’t restore in recovery mode is deleting security software on your computer temporarily. As some anti-virus software will prevent iTunes from detecting device normally, uninstall those apps can be effective in solving the issue. After uninstall them, you can try to restore the iPhone again. When everything is done, you can download and install those anti-virus software back.
5. Check Apple Mobile Device USB Driver
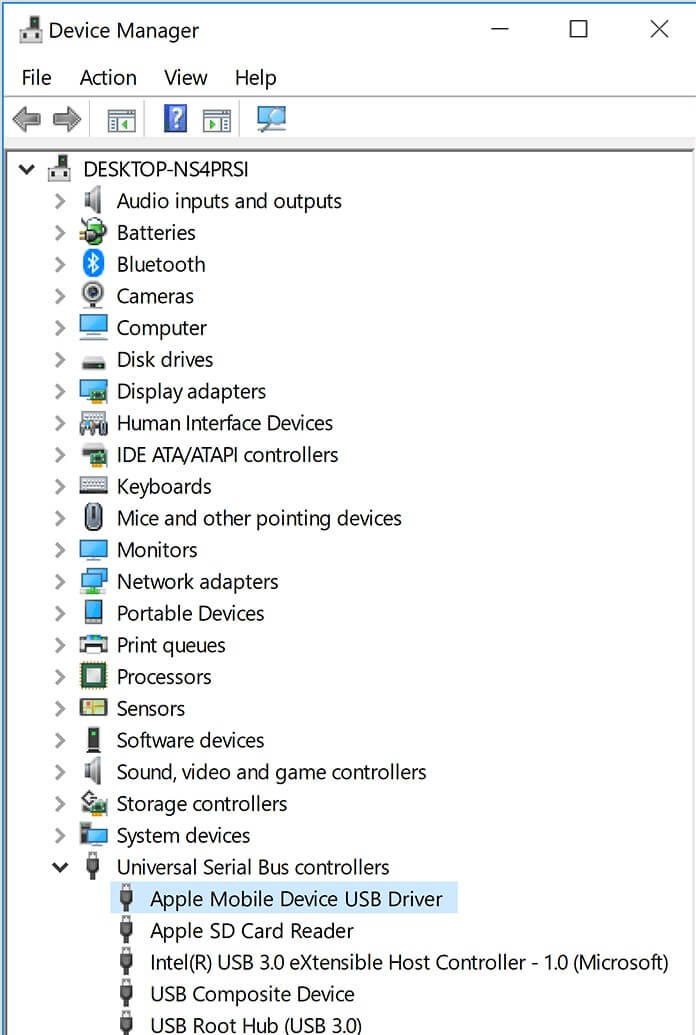
You need to check your Apple Mobile Device USB driver to see if it is installed and work normally. To do this:
- Simply open the Run command by pressing the Window and R keys on your keyboard.
- In the Run Window enter devmgmt.msc and click OK.
- The device manager will locate the Universal Serial Bus controllers section, check if the Apple Mobile Device USB driver is installed and work normally.
6. Force Restart iPhone
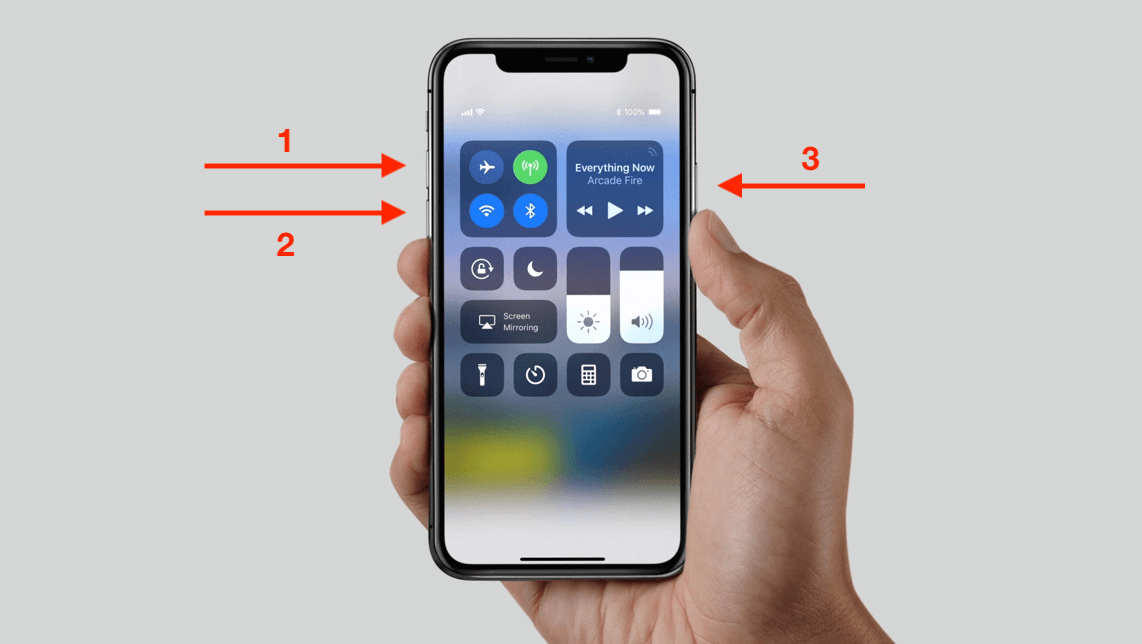
To solve the problem, you may need to restart your device forcefully. And the methods to do it varies between different iPhone models. Follow the steps below to do it.
- For iPhone 8 or later models including iPhone 12: simply press and release the Volume Up button, and then press and release the Volume Down button, finally press and hold the Power button until the Apple logo appears on your screen.
- For iPhone 7/7 Plus: press and hold the Volume Down button as well as the Power button, release them when you see the Apple logo.
- For iPhone 6 or older models: press and hold the Power and the Home button until the Apple logo appears.
7. Use an All-in-One iOS Repair Tool Umendit
Perhaps the best way to fix your phone which won’t restore in recovery mode is by using the all-in-one iOS repair tool known as Umendit. This amazing software is designed to fix problems associated with iOS systems. It is safe, user-friendly, and does not lead to data loss. It's worth mentioning that no matter what you wanted to repair by restoring the iPhone with recovery mode, you can fix them altogether by grace of Umendit. And this tool supports all iOS versions including the newest iOS 15. To use Umendit software, simply follow these steps.
Secure Download
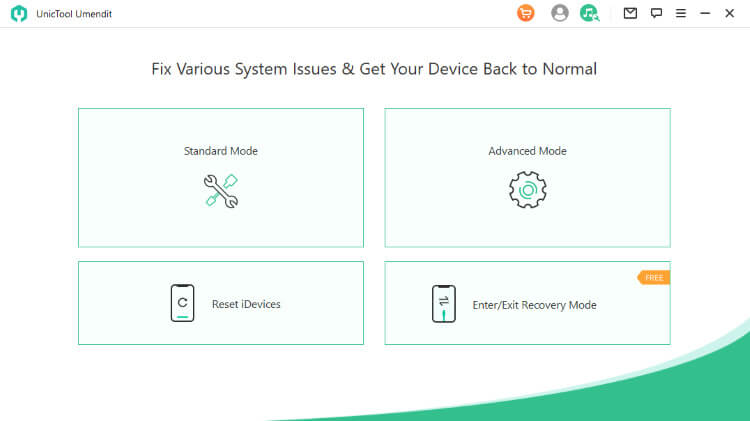
- 1 Download and install Umendit on your PC. Once downloaded and launched Umendit, you will see three different options. Opt for the Standard Repair. Then connect your iPhone to the PC using USB cable and click Next.
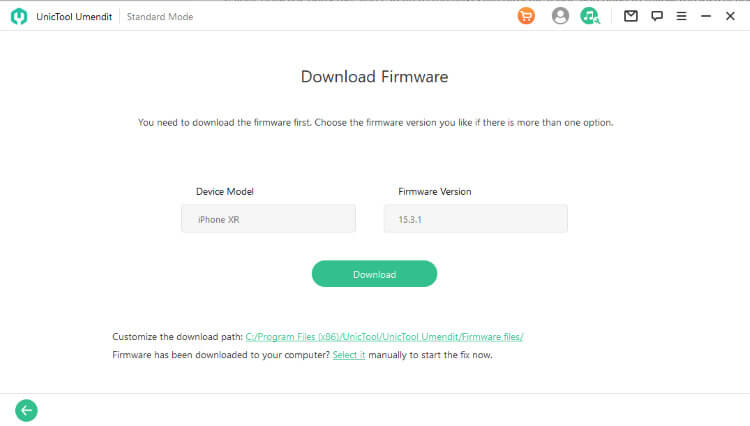
- 2 Then it will provide all the compatible firmware for your iPhone. Choose a preferable one and then click Next.
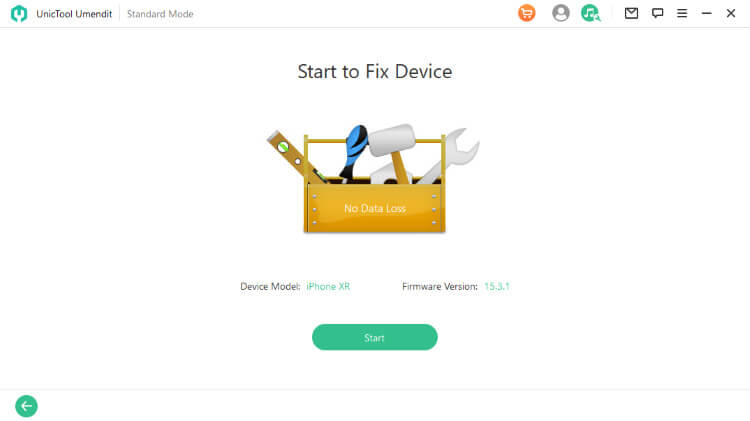
- 3 After downloading the firmware, click Start button on the screen. Then the program will fix the device automatically, ensure that you do not unplug during this process.
8. Restore iPhone with DFU Mode
You can also carry out a DFU restoration via iTunes/Finder. This method also works when your iPhone won't go into Recovery Mode. However, you must note that this method leads to data loss and possible risks. To do this, connect your device to a computer using a USB cord first. And then follow these steps for different iPhone models to put your iPhone into DFU mode.
For iPhone 8 or newer models:
- Quickly press the Volume Up button and then Volume Down button. After that, press and hold the Side button until the screen turns black.
- As soon as the screen goes black, press and hold the Volume Down button together with the Side button for 5 seconds.
- After 5 seconds, release the Side button but keep holding the Volume Down button for at least 5 seconds.
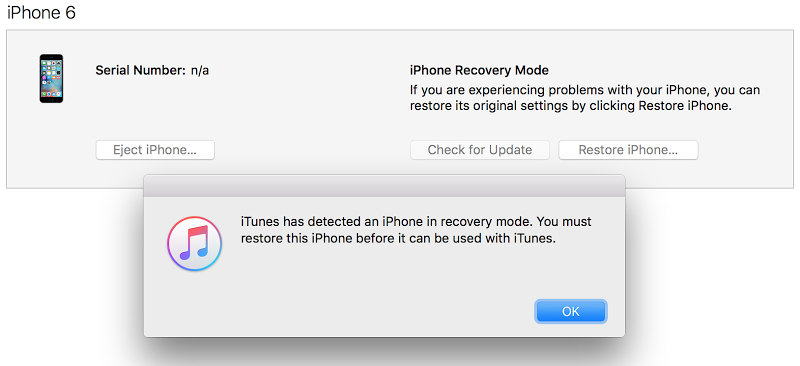
- If your iPhone stays black and you see a pop-up window on iTunes or Finder saying "iTunes has detected an iPhone in recovery mode", then you succeed.
For iPhone 7 and 7 Plus:
- Press and hold the Volume Down button and Side button together for 8-10 seconds.
- Release the Side button but continue holding the Volume Down button for at least 5 seconds.
- If your iPhone stays black and you see a pop-up window on iTunes or Finder saying "iTunes has detected an iPhone in recovery mode", then you succeed.
For iPhone 6 and older models:
- Press and hold Home button and Power button together for 8-10 seconds.
- Release the Power button but continue holding the Home button for at least 5 seconds.
- If your iPhone stays black and you see a pop-up window on iTunes or Finder saying "iTunes has detected an iPhone in recovery mode", then you succeed.
Once the iTunes/Finder has detected your iPhone, simply click OK and then Restore iPhone, finally follow the prompt to confirm your action.
9. Contact Apple
You can also contact any Apple authorized store near you. The team of technicians will carry out a hardware check on your device and provide a professional solution that fixes your device to get it working again. This is especially great for people who have a warranty.
Conclusion
Having an iPhone that won’t restore in recovery mode problems could be quite confusing for any user. However, this issue can be fixed using any of the tips listed above. Perhaps the perfect solution for you is Umendit, the all-in-one iOS repair tool that is user-friendly. And it can fix any kind of iPhone/iPad/Apple TV issues without data loss.
Secure Download
