If you don't want to miss anything in class, then you must check out this free iPhone voice memo to text guide! This article will not only show you how to transcrib iPhone voice memos to text in real time but also recommend other excellent methods for converting voice memos to text. Hurry up and take a look!
Part 1: Best Choice for Voice Memo to Text
Converting voice memos to text is an extremely useful technique for dictation, recording meeting content, or organizing interviews. For iPhone users, using speech-to-text transcription methods can provide convenience and efficiency. However, if you use a real-time iPhone voice memos-to-text tool, it can cause the iPhone to overheat, consume power quickly, and run out of space, among other problems.
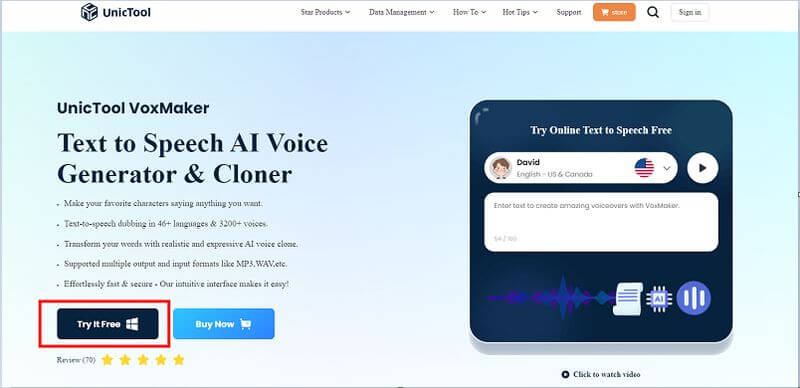
This part introduces you to a simpler and more enjoyable voice memo-to-text converter—UnicTool VoxMaker. This text transcription tool is more accurate and faster at processing recorded files than other mobile tools.
Here are the super easy steps to transcribe voice memos to text using VoxMaker:
- Step 1: Go to the UnicTool official website, download UnicTool VoxMaker, install it on your computer, and launch it.
Step 2: Save the voice memos from your iPhone to your computer.
-
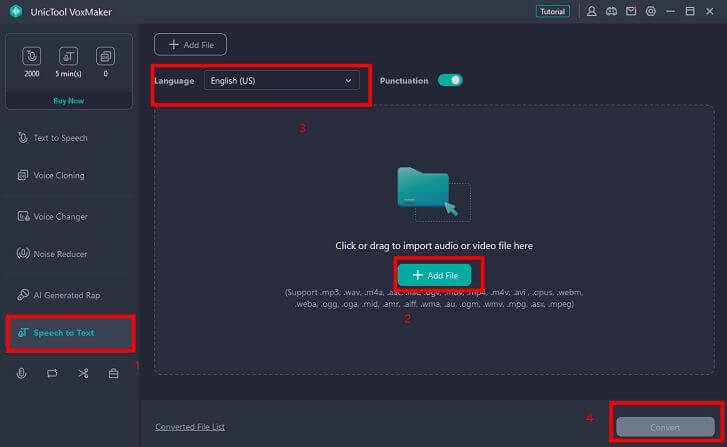
Step 3: In the VoxMaker interface, select the "Speech-to-Text" module, choose the language you need for transcription, import the recording file, and click "Convert" to easily transcribe your voice memos to text!
Part 2: Free Voice Memo to Text Guide (Setup Hassle)
If you're looking to transcribe voice memos to text in real-time for free, you can use the built-in shortcut commands on your iPhone. However, free options often come with complexities and may not suit impatient users. Additionally, prolonged recording and conversion drain the phone's battery and occupy storage space. For long recordings, we recommend UnicTool VoxMaker for smoother conversion.
How Free to convert iphone voice memos to text?
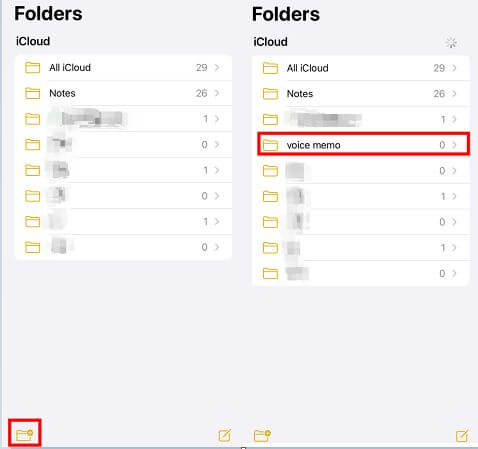
Step 1: Create a Note for Voice Memo to Text Conversion
- Open "Notes" and tap the new folder icon at the bottom left corner. Name the new folder "Voice Memo".
Step 2: Create a Shortcut for iPhone Voice Memo to Text Conversion
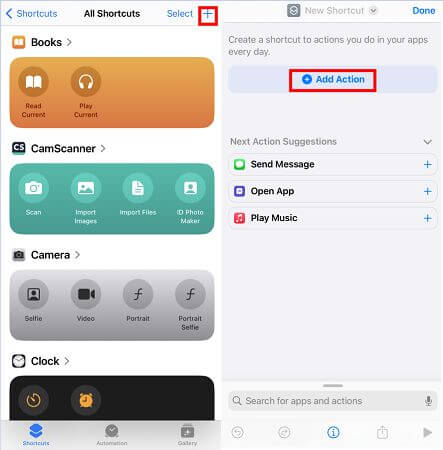
- Open "Shortcuts", tap "+" in the upper right corner, then tap "Add Action".
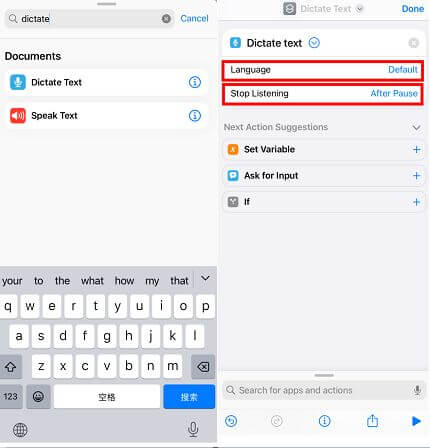
- Search for "Dictate Text" and select it. Choose the language you need for transcription and select "After Pause" for the stop listening option if necessary.
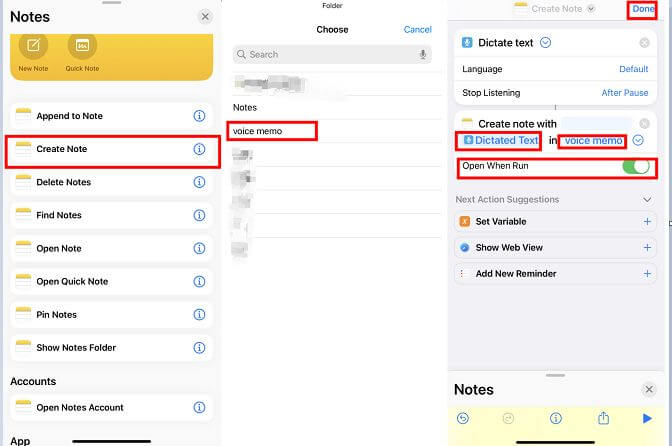
- Tap "Apps" in the search box below, select "Notes", then choose "Create Note" from the menu and select the folder you created in step 1.
-
Tap the name of this iPhone voice memo-to-text shortcut to set the information you want to introduce.
-
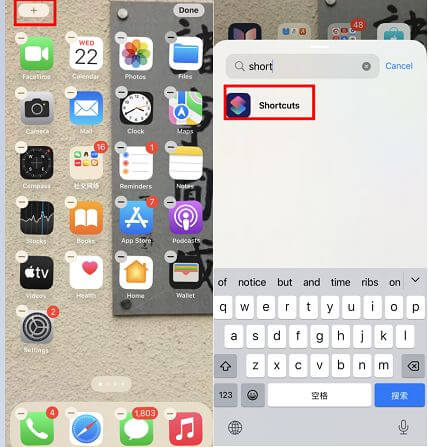
On the home screen, long press and tap "+" > "Shortcuts" > select "Create Note" command to add it.
Long press again to add the voice memo you created in step 1 to your home screen.
-
Tap the shortcut you just created to start converting the voice memo to text, and the converted text will be stored directly in the memo.
Conclusion
Above are all the steps for Voice Memo to Text We hope you'll never miss a meeting or class due to not knowing how to convert voice memos. We recommend using Voxmaker as your iPhone voice memo-to-text tool. Click the button below to try it out!
