iCloud, Apple's cloud storage and syncing service, offers convenient features for iPhone users. However, there might be situations where you need to remove iCloud from your iPhone, whether you're switching to a different account or preparing to sell your device. Here's a step-by-step guide on how to do it effectively:
Step 1. Preparations Before Removing iCloud from iPhone
Step 2. Removing iCloud from Your iPhone
Step 1. Preparations Before Removing iCloud from iPhone
Before you begin the process of removing iCloud from your iPhone, it's important to take a few preparatory steps to ensure a smooth transition:
1. Back Up Your Data:
Backing up your iPhone's data is crucial to ensure you don't lose any precious information during the removal process. You can choose to back up your data using either iCloud or iTunes, depending on your preference.
2. Sign Out of iCloud Across All Devices:
If you're using the same iCloud account on multiple devices, ensure that you sign out from all of them before proceeding with the removal process. This prevents any potential syncing conflicts and ensures a seamless transition.
Step 2. Removing iCloud from Your iPhone
Once you've completed the preparation steps, you're ready to start the process of removing iCloud from your iPhone:
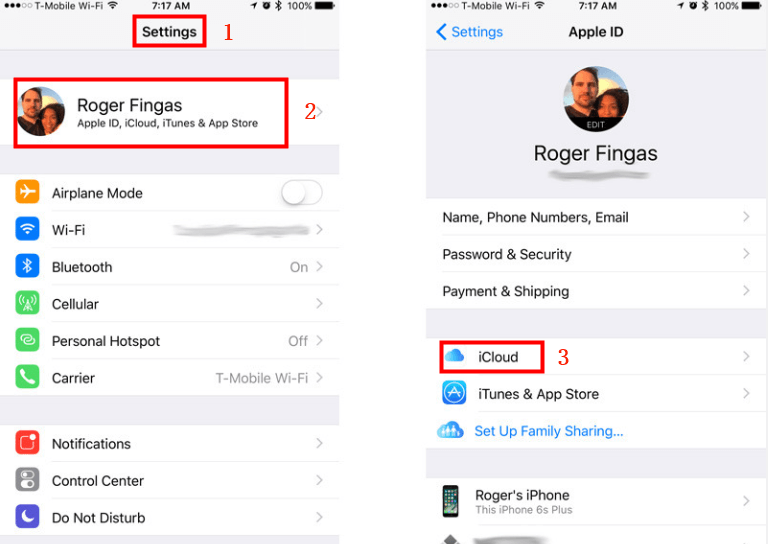
- 1Unlock your iPhone and locate the "Settings" app, easily recognizable by the gear icon. Tap on it to access the settings menu.
- 2In the settings menu, you'll find your Apple ID banner at the top. Tap on it to access your Apple ID settings.
- 3Within your Apple ID settings, you'll see a variety of options. Locate and tap on "iCloud" to access the specific iCloud settings.
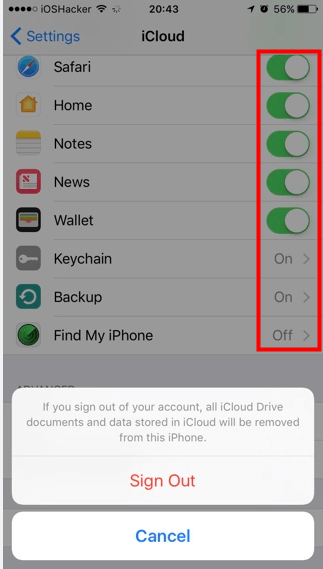
- 4Scroll down the iCloud settings page until you find the "Sign Out" option. Tap on it to initiate the sign-out process.
- 5To ensure the security of your account, you'll be prompted to enter your Apple ID password. Enter the password associated with the iCloud account you wish to remove.
- 6After entering your password, you'll be presented with a list of data categories that are synced with iCloud. Here, you can decide whether to keep copies of this data on your device or delete them. It's crucial to make the right choice here based on your needs.
- 7Once you've chosen how to handle your data, tap "Sign Out" in the upper-right corner of the screen. This action will initiate the removal of your iCloud account from the device.
Step 3. After Removing iCloud from iPhone
After successfully removing iCloud from your iPhone, there are several additional steps you might want to consider:
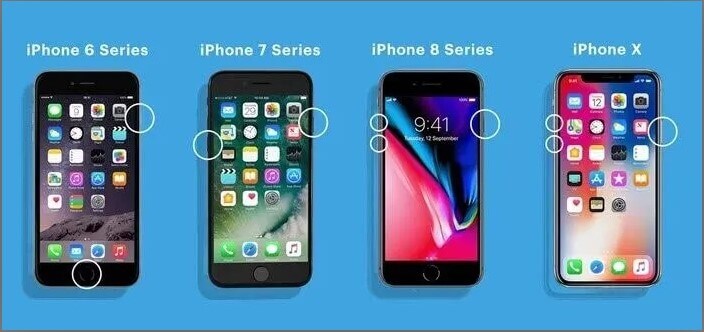
1. Restart Your iPhone:
It's a good idea to restart your iPhone at this point. This helps ensure that all the changes associated with removing iCloud take effect properly.
2. Managing Data:
If you opted to keep iCloud data on your device, it's time to manage it. You can access and organize this data using various apps on your iPhone, maintaining a seamless user experience.
3. Factory Reset (Optional):
If you're planning to sell or give away your iPhone, performing a factory reset is advisable. This will wipe all content and settings from the device, providing you with the peace of mind that your personal information is entirely removed.
Bonus Tip: Remove iCloud via LockEraser [Easiest!]
Utilizing LockEraser by UnicTool, emerges as the most convenient and efficient method for eliminating the iCloud lock from your iDevice. LockEraser is an advanced tool equipped with a variety of unlocking options tailored to suit all iOS models, imcluding iOS 17. This user-friendly tool guarantees safety, security, and simplicity for all your Apple-related requirements.
Opting for LockEraser proves to be the optimal decision, given its multifunctionality in unlocking iOS devices in different scenarios: unlocking Apple ID, screen passcode, screen time passcode, and MDM lock. Thus, if you're seeking the services of the most reputable solution available, LockEraser is worth a try. We highly recommend downloading this tool to take advantage of its extensive range of features.
- No password is required to remove Apple ID
- Bypass the MDM activation screen and remove iCloud Lock.
- Unlock your iPhone/iPad in any scenario without any passcode.
- Take just simple clicks to unlock iPhone, requiring no technical knowledge.
- Support all iOS versions and devices including iOS 17 and iPhone 15 models.
- Free trial is offered for every new users.
Secure Download
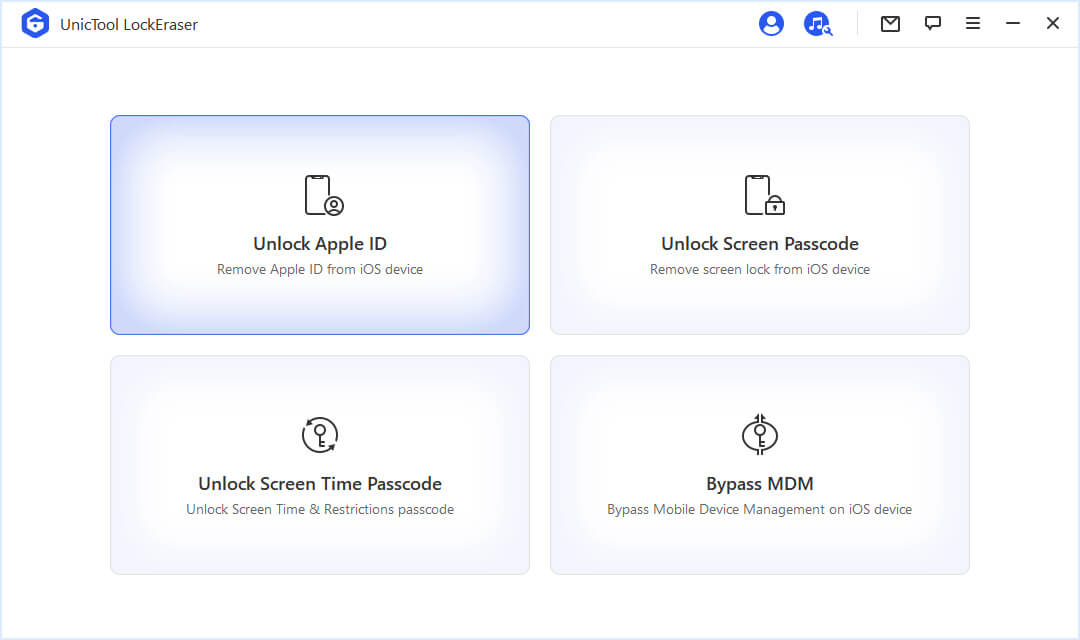
- 1Download, install and launch LockEraser on your computer. Choose the Unlock Apple ID mode, then get your device connected.
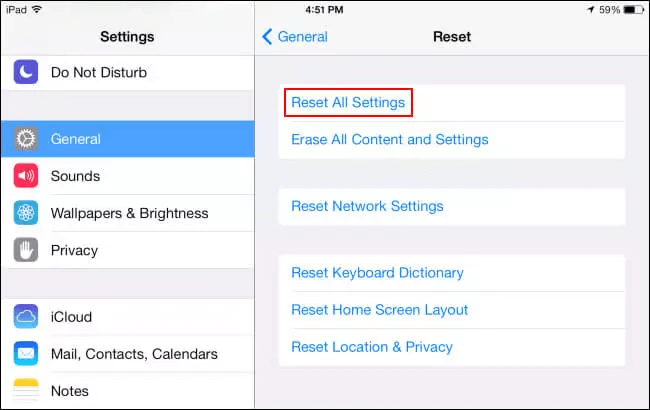
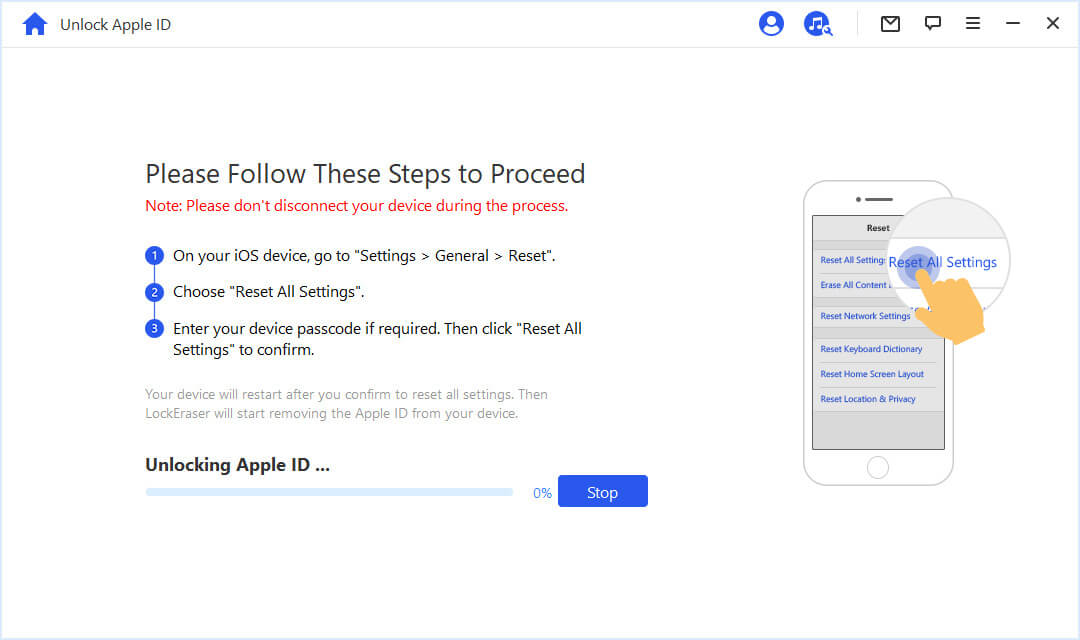
- 2If Find My iPhone is enabled on the device, you will need to reset all settings on the device first. To do that, please go to Settings > General > Reset All Settings. Once you confirm to reset all settings, your iOS device will restart. Then LockEraser will start to unlock your Apple ID and iCloud account.
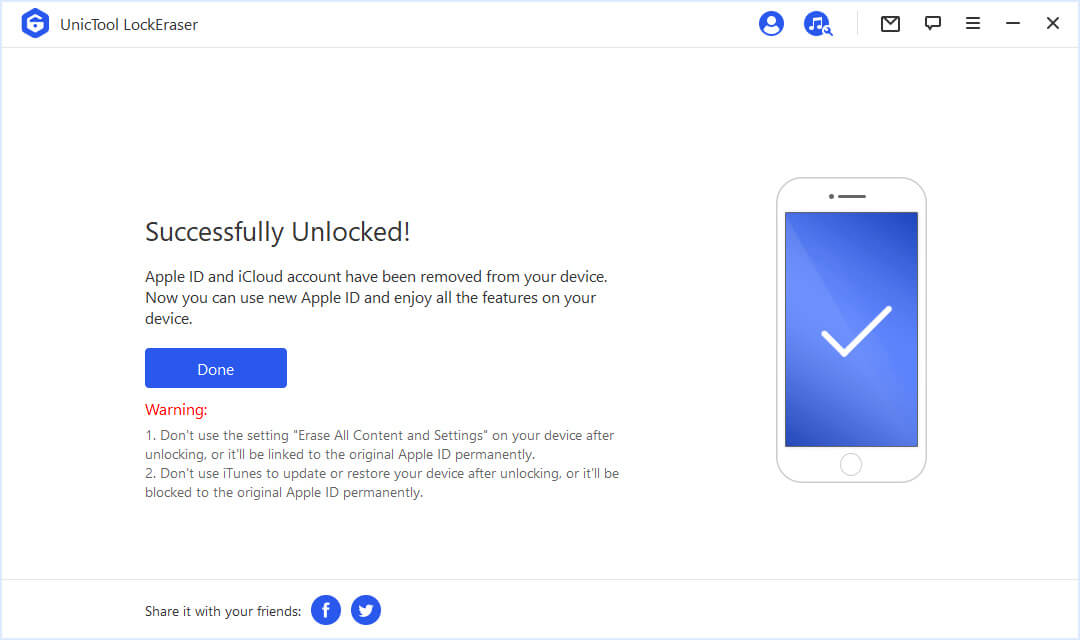
- 3Once done, the Apple ID and iCloud account will be removed from the device. And you can now set up your device with a different Apple ID or create a new one.
Final Words
In conclusion, removing iCloud from your iPhone is a straightforward process that involves careful consideration of data management. By following these steps, you can effectively disassociate your device from your iCloud account while ensuring the security of your data.
However, for those seeking an even simpler approach, LockEraser offers a solution. With just a few clicks, LockEraser allows you to securely remove iCloud from your iPhone, making it an ideal choice. Try it free now!
Secure Download

